


Data privacy has given an impetus to browser based deep learning, as it helps data remain in the vicinity of a device. Another factor driving its demand is quicker page loading.
Deep learning in a browser may seem as odd as a camel being ‘the ship of the hills.’ However, the advent of platforms such as WebGL (JavaScript to render interactive 2D) and WebGPU (graphics and application acceleration) has made it possible to run deep learning (DL) programs on a Web browser—mostly routed through gaming software, and platforms. Although it is possible to have both learning (from data) and inference (for example, whether it will be ‘partly sunny’ tomorrow), the latter technically happens in the Web browser based on the model deployed remotely on the device. One major driving force for this is the increased awareness about data privacy, as it helps data remain within the vicinity of the device itself. Quicker response and page load time is another driving factor.

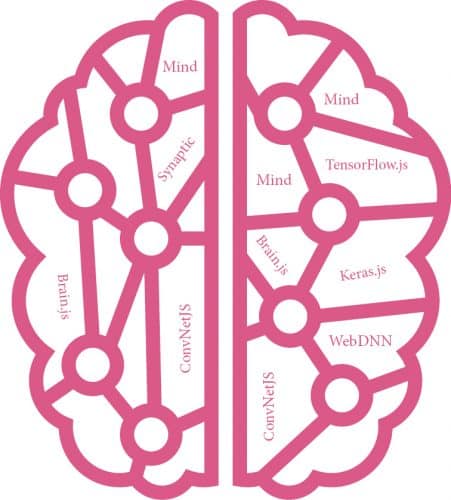
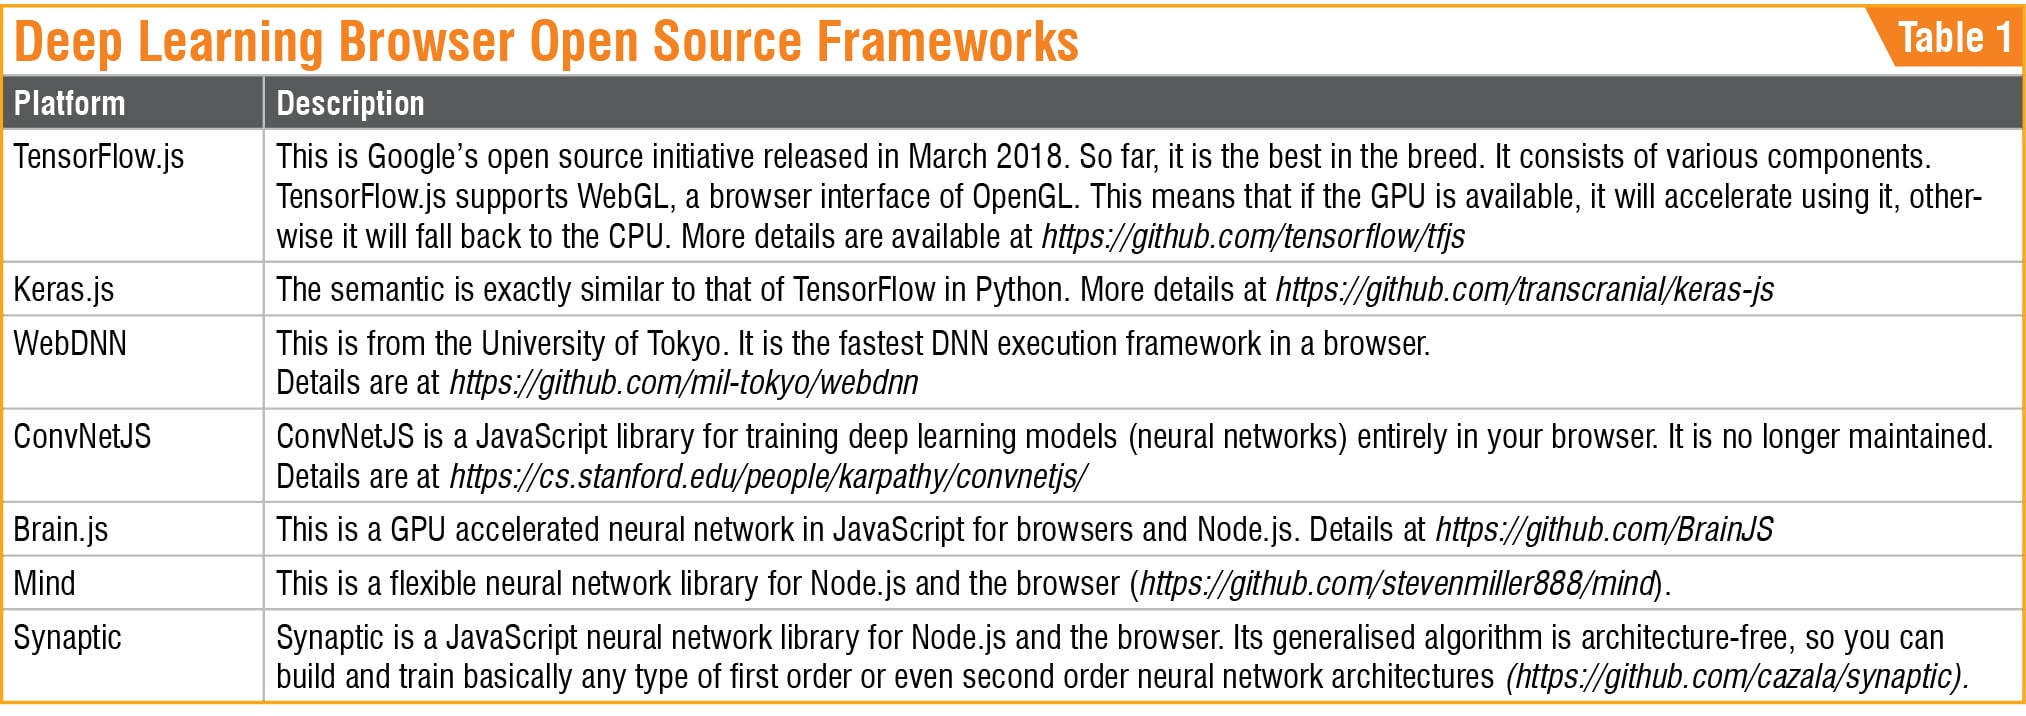
The concept of running deep learning tasks on Web browsers originated around 2015. Andrej Karpathy developed ConvNetJS during his stint as a PhD student at Stanford, which was the very first incarnation of DL in a Web browser. Some of its notable successors are WebDNN, Mind, and Keras.js. Around three years back, in early 2018, Google propelled the movement by developing TensorFlow.js (tfjs), which can be termed the defining moment of this journey so far.
Features
Before delving into more details, let us look at some of the salient features of browser based DL, which continues to evolve at a very quick pace. In fact, it is safe to say that the era of browser based DL has just begun, and that interactive gaming is the main force driving its evolution.

Of the various steps in a DL workflow, decision making, which is based on trained data sets (what we call inference), dominates the scene. Although training is still feasible, people prefer to train globally and infer locally in the Web browser.
To infer something, the first step is to load the trained model on to the browser. This is called the model warm-up step, and is perhaps the most sluggish in the entire inference process.
It has been experimentally determined that TensorFlow.js is x1 to x2 slower (with respect to the CPU) compared to its native counterpart, when run on a browser. Interestingly, it has also been found that tfjs running in an integrated graphics card equals or even outperforms the native TensorFlow on the CPU for the same inference task (Reference: https://arxiv.org/abs/1901.09388). Also, the inference task does not clog up the CPU completely. Experimental results show it tops up around 80 percent of the CPU.
Deep learning in a browser involves three distinct steps.
Model import
This is the most time-consuming step of importing the already trained models into the browser. TensorFlow.js has the tfjs converter (https://github.com/tensorflow/tfjs/tree/master/tfjs-converter) to load the natively trained TensorFlow models into the browser and make it suitable for inference.
Warm up
This is the next step, where the browser consumes the trained model.
Experimental results show TensorFlow.js is ahead in the race.
Inference
This is the decision-making step, where the inference is made locally. Basically, the warmed-up model is used to get the result of the localised test data set.
An example
Let us look at a very simplified JavaScript example of TensorFlow.js in action. The total code looks something like this:
<!DOCTYPE html>
<html>
<head>
<script src=”https://cdn.jsdelivr.
net/npm/@tensorflow/tfjs/dist/tf.min.js”>
</script>
</head>
<body>
<h2>TensorFlow JS example. Input a
number and get prediction near to (3*
input)-1.</h2>
<p>
<span>
<label>Enter an integer here</label>
<input type = “text”
id = “inputNumber”
placeholder = “Enter a number”
value = “” />
<label>(Beyond 1 to 10)</label>
</span>
</p>
<button onclick=”do_prediction
()”>Predict</button>
<p id=”prediction”>Predicted Value:
</p>
<script>
async function do_prediction(){
const model=tf.sequential();
model.add(
tf.layers.dense({
units:1,
inputShape:[1],
bias: true
})
);
model.compile({
loss:’meanSquaredError’,
optimizer: ‘sgd’,
metrics: [‘mse’]
});
const train_labels = tf.tensor1d
([1, 2, 3, 4, 5, 6, 7, 8, 9, 10]);
const train_output = tf.tensor1d
([2, 5, 8, 12, 14, 18, 21, 23, 26, 29]);
await model.fit(train_labels,
train_output, {epochs:100});
const inputVal = parseInt(document.
getElementById(‘inputNumber’).value);
document.getElementById
(‘prediction’).innerText += model.
predict(tf.tensor1d([inputVal])).data
Sync();
}
</script>
</body>
</html>
Let us understand this code a bit. The first part of the code is purely the HTML code for the input textbox, the Predict button, and the output section. The ‘script’ portion is where the TensorFlow.js magic works. It just creates a very simple, linear regression sort of one-layer sequential dense model.
const model=tf.sequential();
model.add(
tf.layers.dense({
units:1,
inputShape:[1],
bias: true
})
);
The model is built with SDG (stochastic descent gradient) as optimiser, MSE (mean square error) as loss function, and the accuracy measurement yardstick. This code looks very similar to the familiar Python Keras code.
model.compile({
loss:’meanSquaredError’,
optimizer: ‘sgd’,
metrics: [‘mse’]
});
Next, we need to get the training data set ready. We are training with 1 to 10 as input (x values) and input * 3 -1 as output (y values):
const train_labels = tf.tensor1d([1, 2, 3,
4, 5, 6, 7, 8, 9, 10]);
const train_output = tf.tensor1d([2, 5, 8,
12, 14, 18, 21, 23, 26, 29]);
Now, let’s do some training with the ‘fit’ method of TensorFlow layer’s API:
await model.fit(train_labels, train_output,
{epochs:100});
Next, let’s have the prediction, by getting the input text the user has given. Note the TensorFlow.Js layer’s ‘model.predict’ API (there’s no change when compared to Python Keras!):
const inputVal = parseInt(document.
getElementById(‘inputNumber’).value);
document.getElementById(‘prediction’).
innerText +=model.predict(tf.tensor1d
([inputVal])).dataSync();
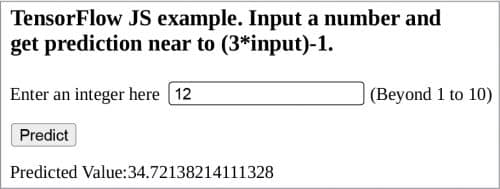
In the end, the ‘do_prediction()’ method is invoked on clicking the Predict button:
<button onclick=”do_prediction()
”>Predict</button>
And the output in your favourite browser is something like what’s shown in Fig. 1.
Takeaway
It is an accepted fact today that the fully connected neural network based inference works perfectly in browsers. Typically, it is not the training but the inference that happens in the browser. Keeping in mind the fact that ConvNetJS is not maintained any more, Google’s TensorFlow.js is the best bet in this regard. It is not necessary that the browser’s host must be GPU accelerated, because the sort of inference that runs on a browser does not fully exploit the GPU. Hence, running it in a ‘normal laptop’ is good enough as far as the inference task in the browser is concerned.
This article was first published in March 2021 issue of Open Source For You
Pradip Mukhopadhyay has 20 years of experience across the stack—from low level systems programming to high level GUIs. He is a FOSS enthusiast, and currently works at NetApp, Bengaluru
