


IoT projects can be fun and a great learning experience for budding programmers. Due to the pandemic, most of us are still stuck at home. This can be a great opportunity to dive into some DIY projects to enhance our programming and tech skills. In this article, we look at a few useful IoT projects that are fun and can be done from the comfort of your home using a Raspberry Pi along with tools and gadgets that pretty much everyone owns.
Internet of Things (IoT) is defined as devices connected over the Internet that are able to communicate or send data between each other. IoT is a very broad area and its capabilities are limitless.
A range of skills is needed to employ and actualise IoT technologies, and most of these skills are hard to come by as the technology is still maturing and has a lot of vulnerabilities. Having said that, learning how to do simple DIY projects using IoT is a great place to start for any technology enthusiast, specially programmers.

Raspberry Pi
The Raspberry Pi is a small, low-cost computer that can be used for, among other functions, DIY (do-it-yourself) IoT projects. It is a plug and play computer with an open source operating system named Raspbian, which is a distribution of Linux. It was initially designed to help kids at school learn the basics of programming at a low cost.

However, since then, Raspberry Pi has become a favourite of many open source and IoT enthusiasts around the world, who have pushed the functionality and usability of this device to great extremes. Added to that, Raspberry Pi also has a huge and active community online to help answer your questions and offer support.
So, without further ado, let us jump in and discuss three different fun-filled and useful DIY projects that you can do today in the comfort of your home, just by using a Raspberry Pi and other simple tools and gadgets commonly owned by most.
Domoticz
Domoticz is a home automation system that lets you monitor and configure various devices like lights, switches, and other sensors and meters. By using it, you can easily manage your home devices with your mobile phone. Domoticz can be installed and used on Raspberry Pi. Let us take a look at how this is done.
What you need
- Power supply and source
- MicroSD card
- Raspberry Pi
- Ethernet cable
- Microphone
Note
Set up the Raspberry on a static IP address.
(i) Upgrade all the packages on the Raspberry Pi by running the following commands:
sudo apt update
sudo apt upgrade
(ii) Install Domoticz in the Raspberry Pi by running the install script from its website. Run the following command:
curl -L https://install.domoticz.com | bash
After the script run completes, press the Enter key.
You will then choose the services you want Domoticz to operate on. For this tutorial, we will leave both HTTP and HTTPS on. But some people prefer to disable the HTTP so that they can use the more secure HTTPS. Press Enter to continue.
Choose the port you want HTTP to run on, although this is usually by default 8080; so just press Enter. And do the same for the HTTPS port, which is 443 by default.
(iii) Choose the Domoticz installation folder, which usually by default is the home folder. Press Enter.
(iv) The installation process is complete at this point and you will be shown two IP addresses, which you should take note of. Press Enter to complete the installation process.
Configuration of the Domoticz Web interface. Get the static IP address we assigned to the Raspberry Pi above. Through a Web browser, run:
http://[IPADDRESS]:8080
At IPADDRESS use the static Raspberry IP address.
At this point you will have access to the Domoticz Web interface and can now monitor your various connected home appliances.
Raspberry Pi Bluetooth speakers
This project is a little bit more difficult if you do not have the right software tools; it is for this reason that we will use the Balena image (balenaSound) which will simplify our work. This can enable audio from Bluetooth and Spotify, as well as other synchronised audio.
What you need
- Power supply and source
- MicroSD card
- Raspberry Pi
- Ethernet cable
- Bluetooth adaptor, if it is not already available
Setup steps
Download balenaSound image for use with Bluetooth. You have to have a Balena account to proceed.
(i) Create an application with the Balena Web interface.
(ii) On the screen that appears, choose the Default Device Type and select the Raspberry Pi that you will use as a default device. After that, click Create and deploy.
(iii) On the page you are taken to with the devices you have deployed, click on Add device to add Bluetooth speaker software, as it is not on the list.
(iv) A pop-up that will allow you to create a balenaOS image for the device you added in (iii) above appears. Select the device type; then choose the version of the balenaOS image to use. For this purpose, we choose the Production option. Another option is the Development option, but this is used for troubleshooting purposes.
To use Wi-Fi, click the toggle under Network Connection; but you must also specify its SSID and passphrase.
(v) Now download balenaOS.
Adding the balenaOS to your Raspberry Pi
To add the balenaOS to your Raspberry Pi, we will use the Etcher tool to write the balenaSound image to the Raspberry Pi’s SD card.
(i) In the Etcher software, click on the Select Image option. From the file dialogue that appears, select balenaSound image to write to the Raspberry SD card.
(ii) Choose the image you want to write the image to.
(iii) Click on Flash to write it to your SD card. Note that the drive you choose will be wiped.
After completion, you can now plug the drive into the Raspberry Pi to run.
Checking the status of your Raspberry Bluetooth speakers on Balena
(i) Go to the Balena dashboard page and click the balenaSound application.
(ii) A list showing the devices running on this application will appear, and from it you can check the status of yours.
(iii) There is a services section from which you can see the Bluetooth audio service, Spotify, and Airplay.
From the interface, you can control the services by taking actions such as start, restart or stop.
Connecting your Raspberry Bluetooth speakers
There are three methods to play music using the speakers: Bluetooth, Airplay, and Spotify connect.
Through Bluetooth. Scan for the available Raspberry Pi Bluetooth speakers. Choose the one that appears as balenaSound and has a unique ID. With this, you can play music from your phone through the Raspberry Pi.
Through Airplay. BalenaSound has a built-in support capability for Apple AirPlay. This is used to send music from one device to another over a network. Find balenaSound AirPlay from the AirPlay devices list, given that it is followed by a unique ID.
Through Spotify Connect. Follow the same procedure as that for Bluetooth above by looking for balenaSound that has a unique identifier and choosing it.

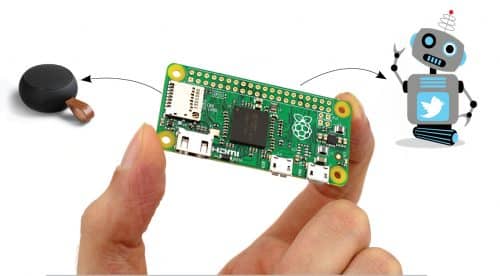
Raspberry Pi Twitter Bot
This third project is a simple Twitter Bot built using Python as the programming language. The example below will show how to write the script while also implementing Twython.
What you need
- MicroSD card
- Raspberry Pi 2/3
- Power supply
- Ethernet cord
Setup steps
1. Registering a Twitter App. In order to use the Twitter API, you first have to register the account as a Twitter application. This will allow you to use the REST interface, which then allows you to interact with Twitter. After registration, go to the Twitter New App page and set the name, description, and website to what you want, and then go to Create Your Twitter Application.
2. On the page you are taken to next, click on the Keys and Access Tokens tab. While here, copy both the consumer key (API Key) and the consumer secret (API Secret); these will be used to connect to the Twitter API. Ignore the other fields as they are not necessary; then click on Create my access token button.
3. The page will refresh, after which you should take both the Access token and Access Token Secret values at the bottom of the page.
4. Setting and writing the Twitter Bot for Raspberry Pi.
(i) Make sure Raspberry is up-to-date by running these commands:
sudo apt-get update
sudo apt-get upgrade
(ii) Install the needed tools to enable the Raspberry Pi Twitter Bot to run. As discussed earlier, we will be using the Twython package to interact with the Twitter API. Run the following commands:
sudo apt-get install python-setuptools
sudo easy_install pip
sudo pip install twython
(iii) After the installation of the Twython package above, create a directory to store your script. Run the following commands:
mkdir ~/twitterbot
cd ~/twitterbot
sudo nano TwitterBot.py
(iv) Now write the final piece of code and run it:
import sys from twython import Twython
#Define our constant variables, this is all the data we wrote down in the first part of the tutorial.
CONSUMER_KEY = ‘***************YOUR DATA*****************’
CONSUMER_SECRET = ‘***************YOUR DATA*****************’
ACCESS_KEY = ‘***************YOUR DATA*****************’
ACCESS_SECRET = ‘***************YOUR DATA*****************’
#Create a copy of the Twython object with all our keys and secrets to allow easy commands.
api = Twython(CONSUMER_KEY, CONSUMER_SECRET, ACCESS_KEY, ACCESS_SECRET)
#Using our newly created object, utilize the update_status to send in the text passed in through CMD
api.update_status(status=sys.argv[1])
Replace the values of CONSUMER_KEY, CONSUMER_SECRET, ACCESS_KEY, and ACCESS_SECRET above with the values you had got earlier. This code above is to allow communication and writing of text to Twitter. Save and file the code by pressing Ctrl+X followed by Y, and then pressing Enter.
(v) Make the above script executable to enable passing of text to the Python file as an argument. Run:
sudo chmod +x TwitterBot.py
(vi) You can now test the Twitter Bot by running the following command and checking your Twitter account to see if the tweet was sent:
sudo python TwitterBot.py “This is a test
tweet from PiMyLifeUps Twitter bot”

In this article, we have taken a look at three useful DIY projects that are also fun and can be done at home with ease. I have shared these projects with the intention of only getting your feet wet with the innumerable applications of the Raspberry Pi. I hope these projects become a good entry point for you to advance to more interesting and fun-filled projects in the field of IoT.
This article was first published in the September 2020 issue of Open Source For You
Mir H.S. Quadri is a scholar and researcher in the fields of artificial intelligence and machine learning. He has worked on multiple projects using a wide array of frameworks. He is also a FOSS enthusiast, and actively contributes to several open source projects

Thanks for giving me more knowledge.
You are most welcome.