


This Arduino based visitor alarm is useful for offices, clinics and shops. It alerts you to the entry of a visitor by producing a beep sound every time the door is opened. The alarm automatically switches off after a few seconds.
Circuit and working
Circuit diagram of the Arduino based visitor alarm is shown below. It is built around an Arduino Uno board (Board1), a reed switch (S1) and a piezo buzzer (PZ1).
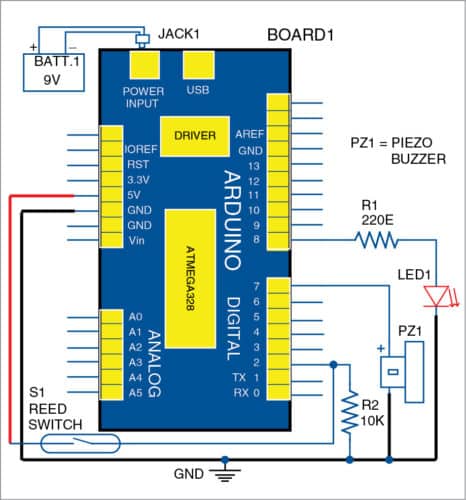
Arduino Uno operates off a 9V DC power supply. It is based on ATmega328 microcontroller and has 14 digital input/output pins, six analogue input pins, a USB connection for programming the onboard microcontroller, a 9V-12V DC power jack, an ICSP header and reset button. It is operated with a 16MHz crystal oscillator and contains everything needed to support the microcontroller.

Reed switch S1 is connected to digital pin 2 of Arduino as the input. PZ1 and LED1 are connected to digital pins 7 and 8, respectively, as outputs. LED1 is connected through a 220-ohm resistor.

Initially, when the door is closed, the magnet on the door is close to the reed switch (normally-open type) on the door frame and hence the reed switch is closed. So pin 2 of Arduino is ‘high.’
When the door is opened, the reed switch opens and pin 2 of Arduino becomes ‘low’ through a 10-kilo-ohm pull-down resistor. This turns on piezo buzzer PZ1 and LED1. After a few seconds, PZ1 and LED1 automatically turn off.
The software (office_visitor.ino) for this project is written in Arduino programming language. Arduino Uno is programmed using Arduino IDE software. ATmega328 on Arduino Uno comes with a bootloader that allows you to upload new code to it without using any external hardware programmer.
Construction and testing
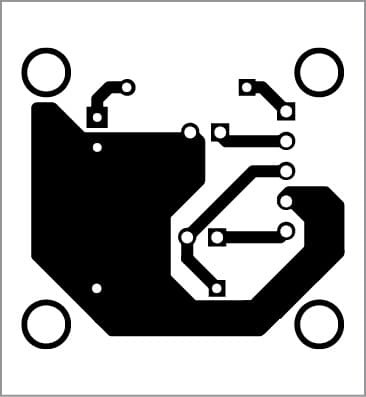
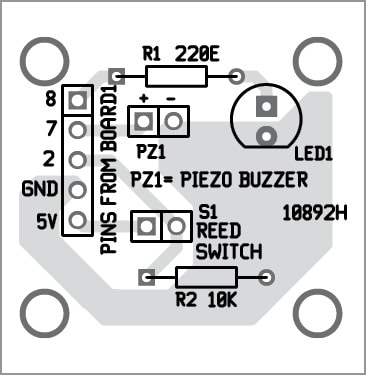
A single side PCB layout of the Arduino based front office visitor alarm and its components layout is shown below. After assembling the circuit, enclose it in a suitable cabinet. Affix the magnet on the door and the reed switch on the door frame such that when you close the door, the magnet comes closest possible to the reed switch. Use a 9V battery/adaptor to power the Arduino Uno board.
Download PCB and component layout PDFs: click here
Download source code
Riju Thazhathu Veettil is R&D engineer at Technonics R&D Lab, Malappuram, Kerala

which software you used to draw circuit diagram
Excuse me, can you send to me arduino based automatic plant watering system by adding simulation part and source code .add GSM
Working Video-https://youtu.be/BBC3i29IAbs
Thank You Riju, We have added the video along with the article.