 Be it for weather prediction, detecting air flow movement through pipelines or obtaining altitude position with the help of a drone, pressure measurement plays an important role in a wide range of applications such as gas leakage, detection of airflow from a pipe, obstacle detection and various factory operations.
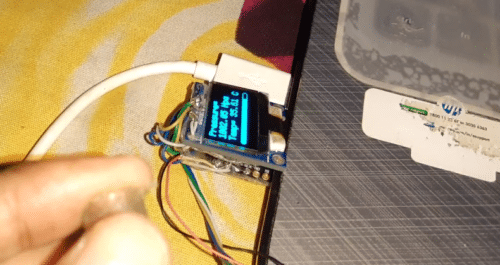
Here we will make a digital pressure gauge that uses a BMP sensor for giving pressure and temperature readings in an OLED display. We can use this in detecting the airflow in pipes and its temperature. We can also use this in measuring the air pressure.

Bill of Materials

Coding
First of all, we need to install the required libraries. To do so, open the Arduino IDE and go to
Sketch—> Library —-> Library Manager. Search for U8g2lib and BMP280 and install them.
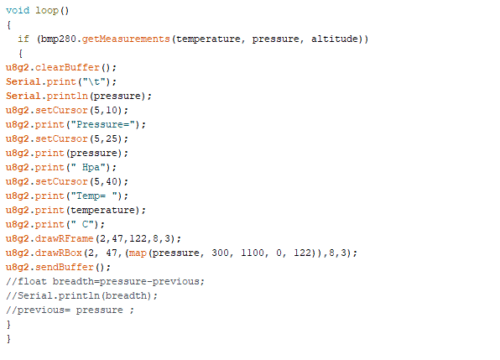
To begin with coding in the Arduino IDE (as described below) first of all, initialize the libraries U8g2 and BMP280 in the code. Then create a setup function and set the SSD1306 and BMP I2C sensor communication.
After that we will create a loop that runs repeatedly. And in this loop function we will take the sensor values for pressure and temperature. Next, we will display those sensor values on the OLED display. To do that we will set the x and y position of the cursor and font name.
After that print the sensor value on the display. Here we will also add a graphical linear bar in

the display for indicating the rise and fall in pressure. Lastly, we will send all the buffers for display on the OLED using u8g2.send buffer().


Now connect the Arduino and to the USB port. Select the right board and port in Arduino IDE for uploading the code.
Connection
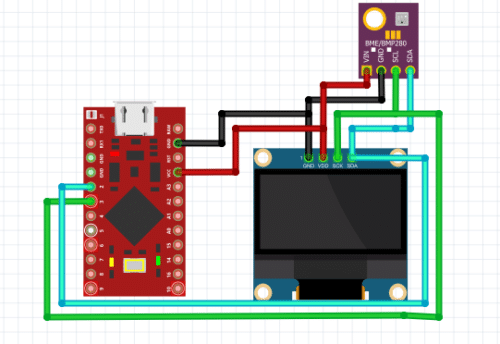
After uploading the code, connect all the components as shown in the circuit diagram given below.

| Arduino | OLED / BMP 280 |
| SCL | SCL |
| SDA | SDA |
| 5V | VCC |
| GND | GND |
Testing
After connecting the components (as shown), power the device using a 5V DC battery. The temperature and pressure readings will appear on the OLED screen. You can now place the device in any air pipe and detect the air flow pressure. You can also use this device for obtaining the pressure difference caused by the weather and environment at a certain location.


