


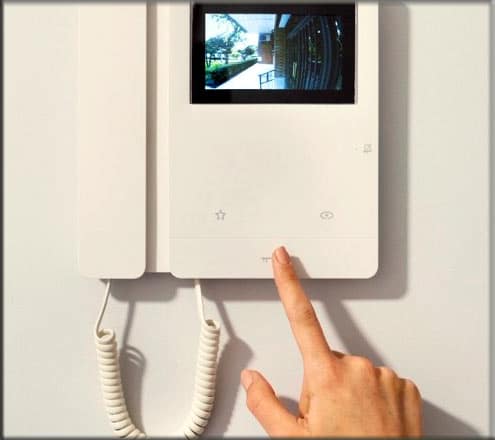
Modern homes and offices rely on cutting-edge technology to enhance security, and a real-time video call doorbell is a must-have. However, many of these video doorbells come with a hefty price tag, ranging from 6k to 12k or even as high as 50k, as shown in Fig 1.
But what if we told you that you can design your very own smart video doorbell for just 3K?
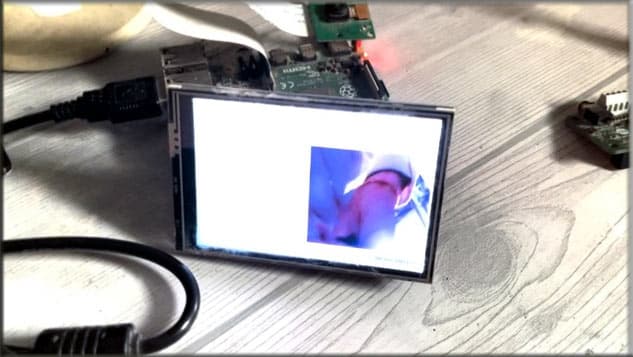
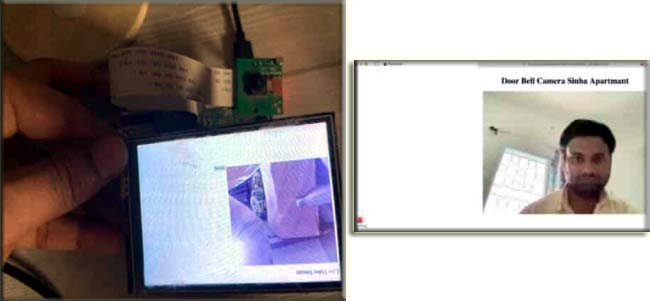
Our DIY solution not only serves as a doorbell but also doubles as a security camera. Plus, it offers video and audio streaming options, as depicted in Fig 2.

But how we make it possible to build an affordable smart video doorbell?
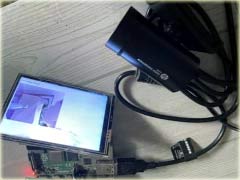
We’ve harnessed the power of Raspberry Pi to create a web server page that streams video accessible from your phone network. We’ve added a user-friendly touch display and a high-quality camera for seamless video calls, delivering real-time video and audio.
And, it’s not just a doorbell – it’s a versatile security camera that you can monitor remotely from anywhere in your home via your network.
Enhance your security affordably with our Smart Video Doorbell solution. Learn how to create your own and enjoy the benefits of a safer and smarter space.
Also Read: Interesting Raspberry Pi Projects
Bill of Materials
| Components | Qunatity | Description | Price |
| Raspberry pi Zero | 1 | RPI Zero W | 1,500 |
| Raspberry PI Camera | 1 | Ribbon Camera | 350 |
| USB Mic | 1 | Mic Sound Card | 100 |
| Touch Display | 1 | 3.5 Inch | 1,000 |
| Total | 2,900 |
Smart Video Doorbell – Code
Step 1: Setup Apache and PHP
Begin by installing PHP and the Apache web server. These are essential for hosting your smart doorbell system.
Step 2: Enable VNC
To enable VNC on your Raspberry Pi, open the terminal and enter the following command:
sudo raspi-config
Step 3: Install Apache and PHP
Install Apache and PHP with the following commands:
sudo apt install apache2 -y sudo apt install php -y
Step 4: Display Driver
Install the display driver according to the instructions provided with your display. This step is crucial for visualizing your smart video doorbell system.
Step 5: Web Page Creation
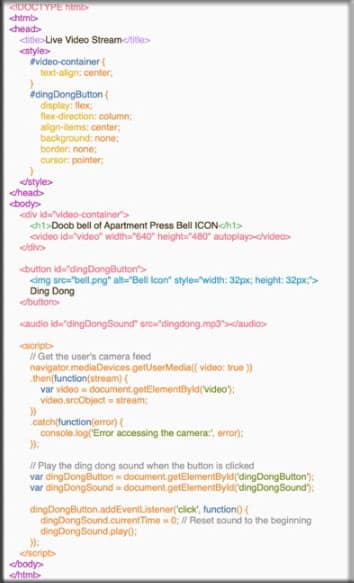
Now, create a web page that can stream camera video and audio in real time. You can even add a large bell icon for visitors to ring the doorbell. Save this web page code as PHP.
By following these steps, you’ll turn your Raspberry Pi into a powerful smart doorbell system that enhances your home security. Enjoy real-time video, audio, and visitor interaction with this DIY smart video doorbell project!
Smart Video Doorbell – Circuit Connection
Here’s How to Connect Your Raspberry Pi to Wi-Fi and Set Up Your Smart Doorbell 📡🏠
- Connect to Wi-Fi: Ensure your Raspberry Pi is connected to your home or office Wi-Fi network. This is crucial for seamless operation.
- Open the PHP Code: Access the PHP code you’ve created for your smart doorbell system. You can use a code editor on your Raspberry Pi to open and edit the PHP file.
- Save Files: Save the image and the ‘dingong.mp3’ audio file in the ‘var-html’ folder on your Raspberry Pi. This is where your web server (Apache) serves files.
- Access Your Doorbell: In your web browser, enter the address of your Raspberry Pi followed by the PHP code file name. It should look something like ‘http://your-pi-address/your-code.php.’
- Permissions: When you open the page, your browser will request permission to access the microphone and camera. Grant these permissions to enable the audio and video features.
- Ring the Bell: You’ll now see the ring bell icon displayed on your screen, along with the live camera feed and real-time audio streaming.

Smart Video Doorbell – Working
Now, Power Up Your Device and Experience the Magic 🔌🔔
- Power Up: Ensure your smart doorbell device is powered on and ready to go.
- Ring the Bell: Simply click on the ‘Ring Bell’ button, and you’ll hear the sound through a connected speaker. The video feed will also appear in real time, giving you a complete view of who’s at your door.
- Two-Way Communication: Here’s the cool part – the homeowner can not only see and hear you but can also communicate with you. They can access the device’s screen using VNC from any device, whether it’s a phone, laptop, or more.
With this setup, you can have a seamless and interactive experience when visitors ring the doorbell. Stay connected and communicate easily with the homeowner using this innovative system!
Other DIY Doorbell Projects That You Might Like!!!
- Wireless Doorbell
- Touchless Doorbell That Rings Only When Hand Is Sanitised
- Smart Touch Display Multi-Door Doorbell System
- Touchless Doorbell
