


 While working on an IoT based data acquisition system using health monitoring sensors, we started visualising this health monitoring system, which could be worn like an ornament in our day to day life. We thought, what if it’s a smart device that can store real-time data, creating a platform for both monitoring and evaluation for a doctor while we are in our home itself. It could have an SOS feature, which is one of the main issues in India where people are unable to contact hospitals or doctors well in time.
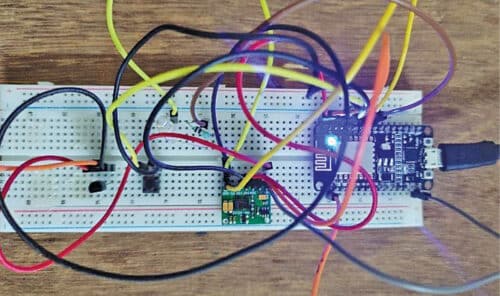
Let us try and build the system that can take care of the above-mentioned problems. A private channel can be created for the person whose health parameters are to be monitored. There can be provision for an SOS emergency indication to alert the doctor or any other designated person. Author’s prototype of the system on a breadboard is shown in Fig. 1.
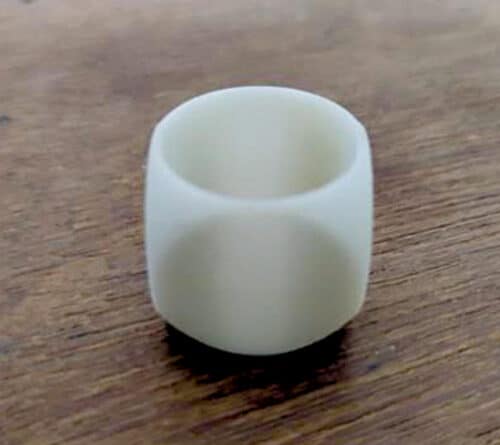
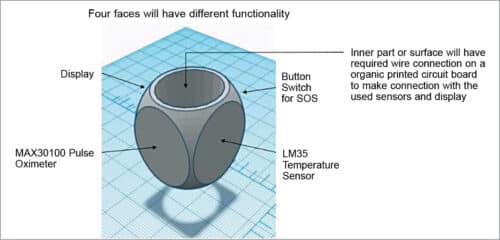
The idea is to enclose the whole system in a small-size ornament like a ring to monitor the health parameters. So, we can replace the components in the prototype with small-size components that can fit in a ring whose design is of our choice. The prototype can be designed in the shape of a dice shaped ring, as shown in Fig. 2 and Fig. 3, or any other practical shape of our choice.

Circuit and working
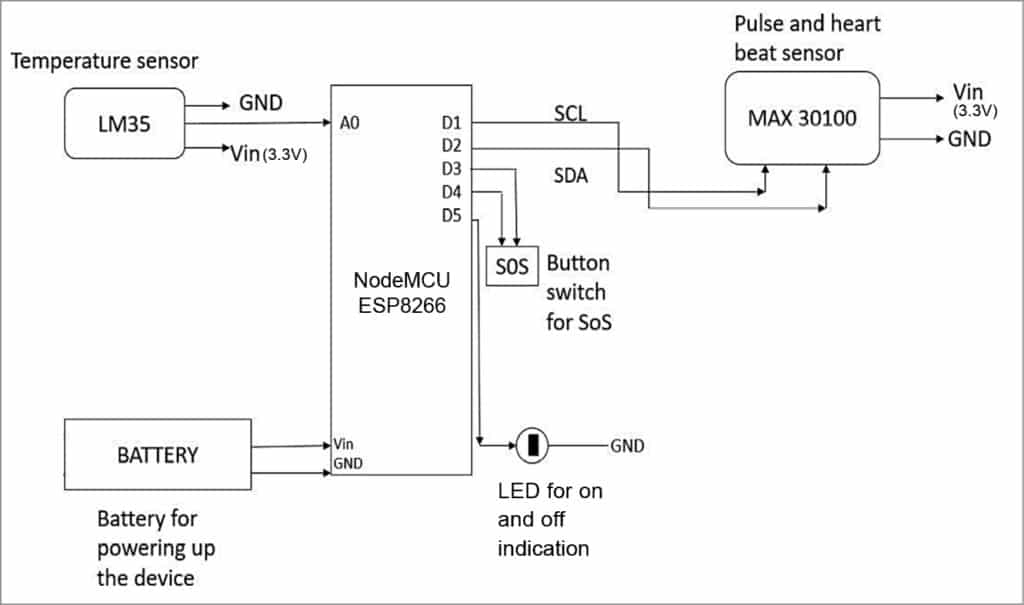
Circuit diagram of the smart wearable health monitoring ring built around nodemcu ESP8266 microcontroller is shown in Fig. 4. The other components include MAX30100 pulse oximeter sensor, temperature sensor LM35, a small pushbutton switch for triggering an SOS message, an LED for on/off indication, and a tiny 3.3V battery.
ThingSpeak is used to create the private cloud based IoT-enabled monitoring platform with data retrieval capability. (ThingSpeak is an IoT analytics platform service that allows you to aggregate, see, and analyse live data streams in the cloud.) You read the data from the public ThingSpeak Channel 12397 Weather Station and write it into your new channel.
You can sign into ThingSpeak using your MathWorks account credentials, or create a new account. After that click on Channels> MyChannels, then on Channels page click on My Channels, as shown in Fig. 5.

Next, under New Channel, in the boxes next to Fields 1, 2, and 3, enter the following channel setting values, as shown in Fig. 6:
Name: Dew Point Measurement
Field 1: Temperature (F)
Field 2: Humidity
Field 3: Dew Point
Next, click on Save Channel at the bottom of the settings. You will now see the following tabs:
Private View. It displays information about your channel that only you can see.
Public View. If you choose to make your channel publicly available, use this tab to display selected fields and channel visualisations.
Channel Settings. It shows all the channel options you set at the time of creation. You can edit, clear, or delete the channel from this tab.
Sharing. It shows channel sharing options. You can set a channel as private, shared with everyone (public), or shared with specific users.
API Keys. This tab displays your channel API keys. Use the keys to read from and write to your channel.
Data Import/Export. This tab enables you to import and export channel data.
You can thus create a private channel as per your requirement and then use the provided API to write the data that is to be exported in different formats. The data can be extracted in all three formats: xtml, csv, and json. This data can be used in Android based apps, as json format is available, and also for web applications. The requisites like SSID code, password, channel name, and the API key should be changed while you create a new system for a different person.
Coding
After the ThingSpeak API and channel setting is done, create the code to read sensors’ data and upload it to ThingSpeak cloud network in real time. In the code, you need to do the SSID and password settings for your network, which can be your phone hotspot or home Wi-Fi network.
For uploading the source code smart_ring.ino into Arduino Uno board, connect the Arduino board to desktop/laptop using USB cable. Next, select the board and port and upload the code (smart_ring.ino). You can download it from the link https://www.electronicsforu.com/electronics-projects/smart-werable-ring
| Bill of Material | ||
| Component name | Quantity | Description |
| Nodemcu ESP8266 | 1 |
Microcontroller to correlate the entire process and connect to cloud
|
| MAX 30100 pulse oximeter sensor | 1 |
To measures pulse and spo2 level
|
| Push button | 1 | Switch |
| LM35 | 1 |
Temperature measuring device
|
| LED and resistor | 1 each | Indication of action |
| Jumper wires | As required | Used for connection |
| Lithium-ion battery | 5V/2000mAh | Used to power the device |
Construction and testing
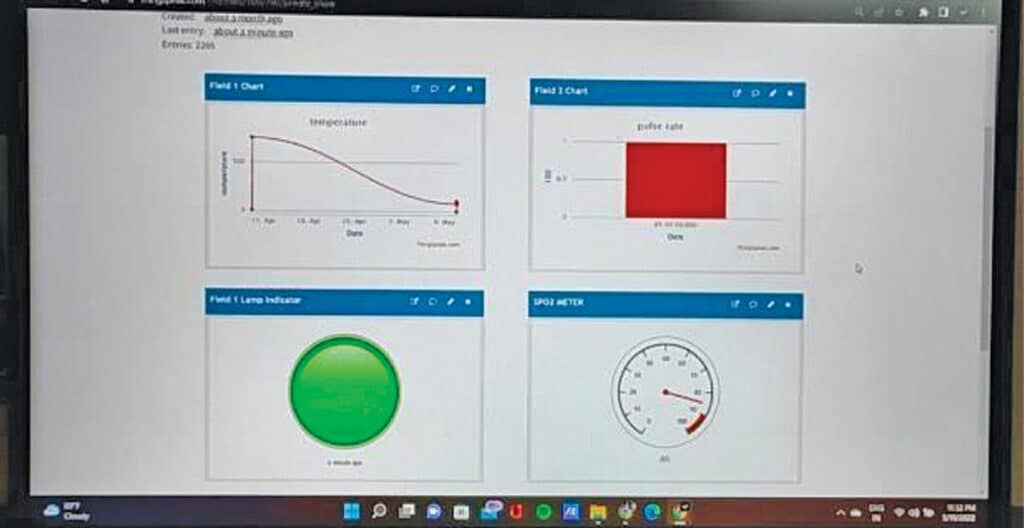
Provide power to the assembled circuit with a 5V USB adaptor or any other 5V DC regulated power supply and then wait for a few seconds, till the circuit connects to Wi-Fi. Now open the ThingSpeak channel you have created; you can see your health data in real time.
When you place a finger on the MAX30100 sensor, it will start showing your pulse rate, oxygen percentage in blood, and temperature of your body in real time on the ThingSpeak channel. When you press the SOS button, you can see the state of SOS button in real time from any device anywhere.
This futuristic device can be useful for everyone, especially so for the old and infirm, the sick and bedridden, and the pregnant women, all of whom need special care and attention. It can reduce their trips to the doctor or a hospital as the vital health parameters can now be viewed remotely. Welcome to the new age of health monitoring!
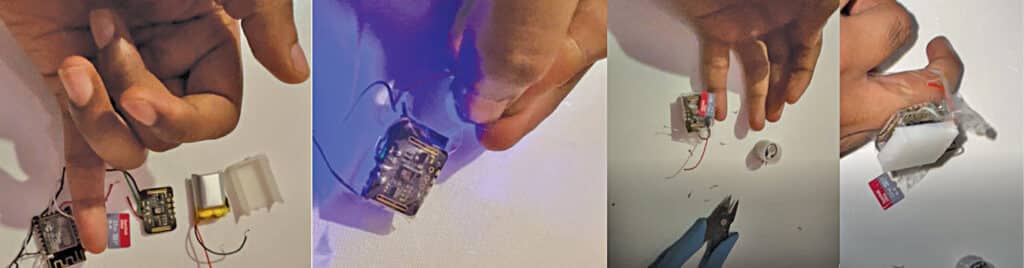
During assembly, the ESP8266 NodeMCU is replaced with ESP 8266 chip and all other sensors and components can be fixed into the small ring, as shown in the Fig. 8.
Download source code
Duraiarasu. E is B.E in Electronics and Communications Engineering (ECE). His areas of interest include Embedded Systems, VLSI, IoT, Robotics and Automation, and Machine Learning