


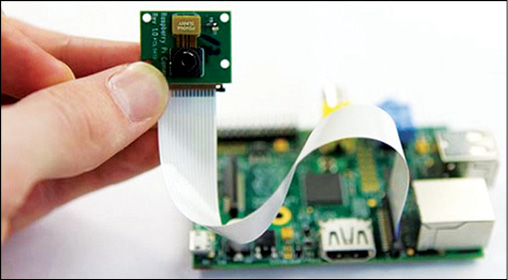
 This project describes how to connect a web camera to the Raspberry Pi and make use of it. Raspberry Pi board has an onboard connector which can be used for connecting the camera directly. Connect the camera very carefully, as shown in Fig. 1, and take good grounding measures before touching it.
Installation of Raspberry Pi camera
First of all, open the Raspberry Pi’s configuration file, Raspi config, with the command:
$ sudo raspi-config
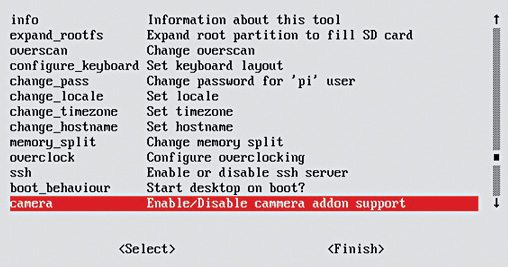
Then enable the camera, as shown in Fig. 2.
If your firmware is old, update and upgrade it using the command:
$ sudo apt-get update
$ sudo apt-get upgrade
Now you should see the camera option. Enable it, as indicated in Fig. 2. After connecting the camera to the Raspberry Pi, see how best you can make use of it.
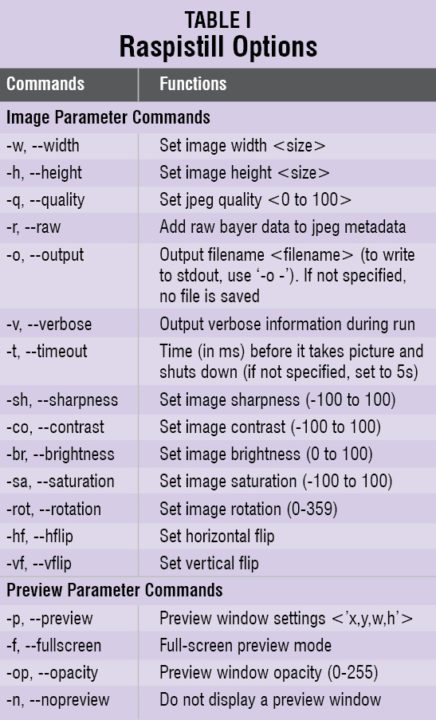
The command ‘raspistill’ is used to take still pictures. It comes with various parameters which you can choose for the command. Type raspistill in the terminal and you will see all the options, as shown in Table I.
 For example, if you want to capture an image, type the command given below (also refer Fig. 3):

$ raspistill -v -o image.jpg
Here ‘-v’ indicates that the output is verbose. You will see a preview of the snapshot for five seconds and the snapshot will be saved as image.jpg in the home directory. You can do several things with the image, such as defining its dimensions and quality. Check all the options and try them.
For video, you can use ‘raspivid’ command. For checking various options, type raspivid in the terminal. You will find all the options, as shown in Table II.

To capture a 10-second video with the Raspberry Pi camera, type the command (also refer Fig. 4):

$raspivid -o video.h264 –t 10000
Here ‘video’ is the name of your video, ‘.h264’ is the file extension and ‘10000’ is the time in milliseconds.
Check all the functions; you can do several things, such as recording the video and defining its frame size. You can even stream the video captured by the camera. The simplest method that I found for this was with mplayer and netcat.
Download both mplayer and netcat on a Windows computer.
Extract files and you will see two exe files (mplayer.exe and nc.exe) that can be executed through command.

Install netcat and mplayer on Raspberry Pi using the command (also refer Fig. 5):
$ sudo apt-get install
mplayer netcat
You need to set up the Windows computer to receive transmission from the Raspberry Pi. So open command prompt and go to the directory where you have extracted mplayer and netcat. Type:
nc –l –p 5001|mplayer fps
31 –cache 1024 –
This will direct the feed from port 5001 to mplayer (refer Fig. 6).

Find the IP address of your Windows computer with ipconfig in command prompt.
Then go back to Raspberry Pi and type the command (also refer Fig. 7):

Raspivid –t 999999 –o – |nc [yourIP]
5001
This will take the video and send it to port 5001
When you go back to the computer, you will see the command prompt. Hit Enter key and the video starts streaming. You will see mplayer icon at the bottom-right corner of the window. Click it and you can see live footage.
The author is working as an assistant manager at Samtel Avionics Ltd.
