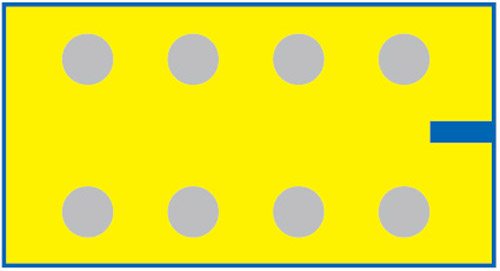
 The circuit presented here can be used as a lock for important electronic and electrical appliances. When a card is inserted inside its mechanism, depending upon the positions of the holes punched on the card, a particular appliance is switched on. The card is inserted just like a CD is pushed inside the disk drive. It is rectangular in shape with holes punched on it.
The electronic lock is connected to an access control system, which ensures that only the selected appliance is switched on and prevents false operation of the system.
Circuit description
Fig. 1 shows the block diagram of the electronic card lock. The lock has three main parts: Card sensor, microcontroller and appliance (load). The card sensor senses the code on the card (holes punched on the card) and provides the signal to the microcontroller. The microcontroller compares the code and switches on the corresponding device.
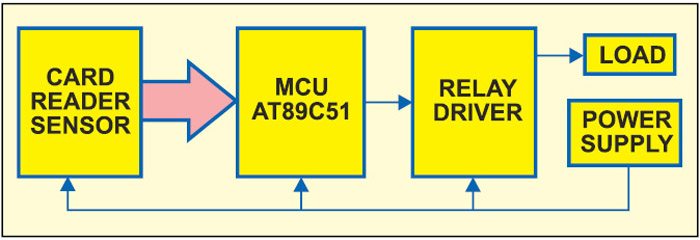
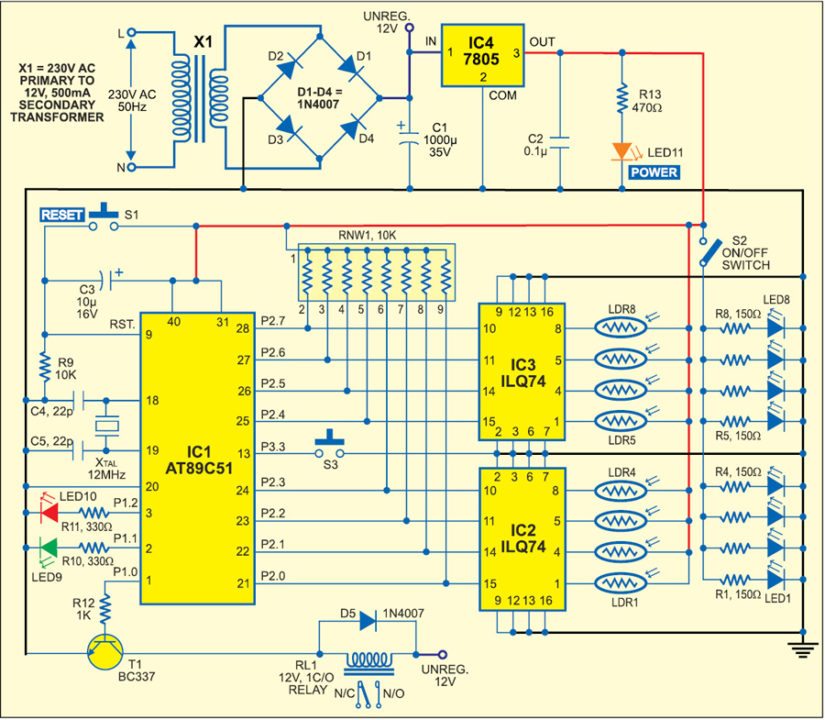
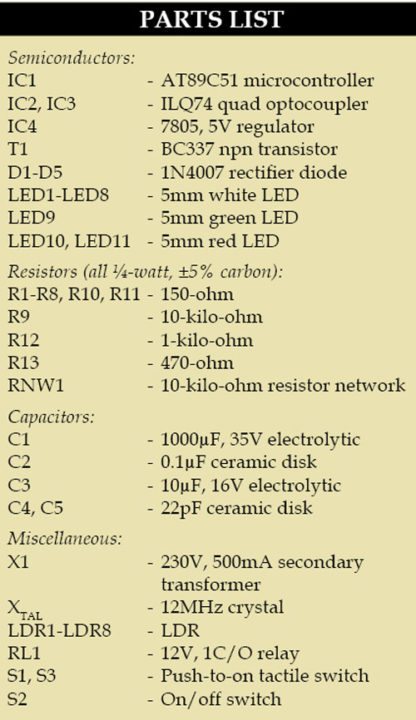 Fig. 2 shows the circuit of the electronic card lock. It comprises quad optocoupler ILQ74, microcontroller AT89C51, regulator 7805 and a few discrete components. The card sensor consists of eight light-dependent resistors (LDRs), eight LEDs and two switches (S2 and S3). LDR1 through LDR8 and LED1 through LED8 are placed face to face, respectively. One terminal of all the LDRs is connected to 5V and the other terminal is connected to the respective LED of optocoupler ILQ74.
The ILQ74 is a quad optically-coupled pair with a gallium-arsenide infrared LED and a silicon npn photo transistor. Switches S2 and S3 are used to provide power to the LEDs for glowing and interrupt signal to the microcontroller.
Microcontroller AT89C51 is the heart of the card lock. It is an 8-bit microcontroller with 4 kB of flash, 128 bytes of RAM, 32 input/output (I/O) lines, two 16-bit timers/counters, six interrupt sources, a full-duplex serial port, on-chip oscillator and clock circuitry.
Power-on reset is provided by the combination of resistor R9 and capacitor C3. Switch S1 is used for manual reset. A 12MHz crystal along with two 22pF capacitors provides the basic clock frequency to microcontroller AT89C51.
Port pins P2.0 through P2.7 of the microcontroller are pulled high with resistor network RNW1, which is further connected to the collectors of optocouplers IC2 and IC3, respectively. Port pins P1.0 through P1.2 are used to drive the relay, green LED and red LED, respectively.
The outputs of the optocouplers are fed to the microcontroller to compare the code. If the code matches with the code stored in the microcontroller, port pin P1.0 of AT89C51 goes high to drive relay RL1. At the same time P1.1 also goes high, driving the green LED (LED9) to indicate successful operation. Diode D5 acts as a freewheeling diode for relay RL1. Glowing of the red LED (LED10) indicates that the code does not match.
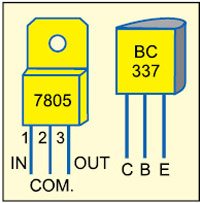
To derive the power supply for the circuit, the 230V AC mains is stepped down by transformer X1 to deliver a secondary output of 12V, 500 mA. The transformer output is rectified by a full-wave rectifier comprising diodes D1 through D4, filtered by capacitor C1 and regulated by IC 7805 (IC4). Capacitor C2 bypasses the ripples present in the regulated supply. LED11 acts as the power indicator and R13 limits the current through LED1. Fig. 3 shows the pin details of regulator 7805 and BC337.
Construction
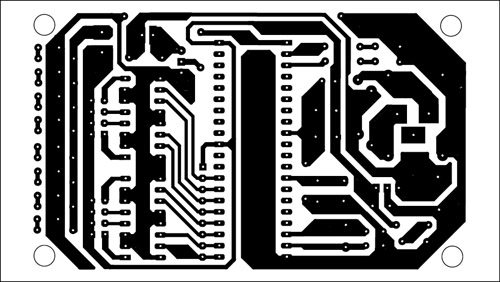
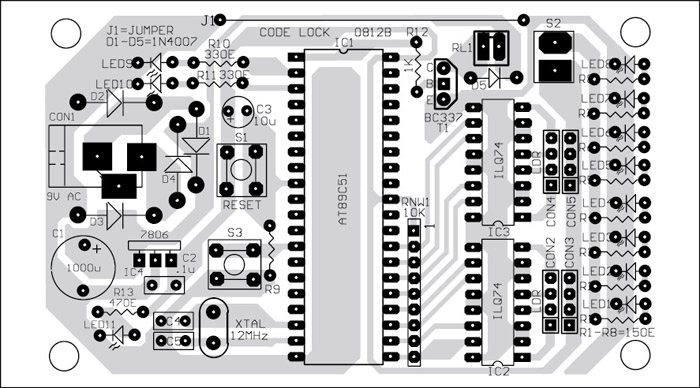
An actual-size, single-side PCB for the electronic card lock is shown in Fig. 4 and its component layout in Fig. 5. Assemble the circuit on a PCB as it minimises time and assembly errors. Carefully assemble the components and double-check for any overlooked error. Use IC base for placing the microcontroller on the PCB. Check the supply voltage. Align the LDRs and LEDs such that these directly face each other. Cover the LDRs with suitable masking to protect these from other light sources. The card is shown in Fig. 6.
Insert the card into the card sensor slot, close switch S2 and then press switch S3. The internal LEDs of the optocoupler glow depending on the holes on the card. The internal transistors of the optocoupler drive into saturation and its collector goes low.
Download PCB and Component Layout PDFs: click here
Download Source Code: click here
Software
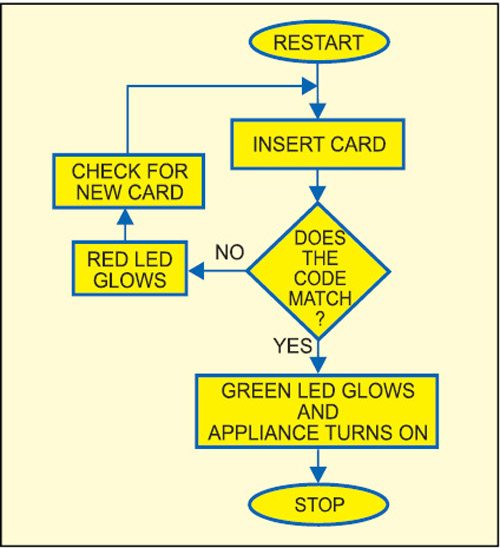
The software for the electronic card lock is written in Assembly language and compiled using the Keil µVision4 compiler. The generated hex code is burnt into the microcontroller by using a suitable programmer. The program works as per the flow-chart shown in Fig. 7.
If you are looking for the difference between Microprocessor and Microcontroller, you can read it here.
This article is a part of the Top 15+ Microcontroller Projects. If you want to read more projects based on Microcontroller, can go through this article.
The author is M.Tech from DCRUST Murthal University.


sir can we have a youtube link of this project….
Could you please tell the code for the system shown above i.e. the code required to allow the flow of current to the load for this particular project
Could you tell the code for the above system i.e. the code required to allow the power supply to switch on the load
Download the code by clicking “click here” given at the end of the article
Could you provide a simulation for this project?