


 Have you ever thought of making an audio system at home? Building your own audio system can not only be fun and exciting, but it can also give you the same performance at a much lesser cost.
Just like previously, we build the multi-room audio system, but this time I tried something different.
So I made my own inexpensive DIY remote-controlled MP3 player with FM Radio and Bluetooth using easily available components and tools.

It has USB, AUX, and MicroSD/TF (TransFlash) card ports, making it very convenient to interface with external audio systems and storage devices.
Below you can see the video to get an overview of the portable mp3 radio player.

Components Required
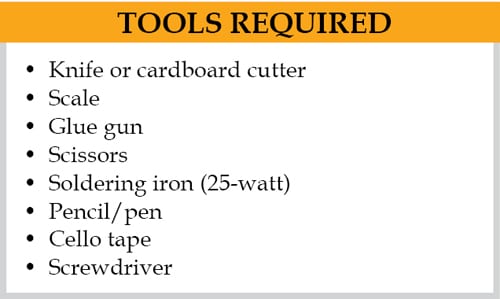
Collect all the parts and tools required for the project before starting its assembly. The significance of the parts is explained below.
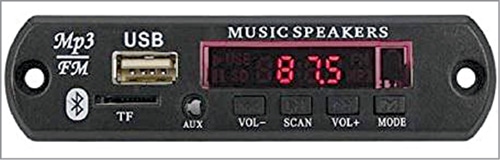
Bluetooth MP3 Player with FM Receiver Module
This is the main part of the project. The compact MP3 player module with an FM receiver is readily available in the market and through many e-commerce portals. It can be installed in your vehicle, desktop PC audio system, home theatre system, or any other audio amplifier.
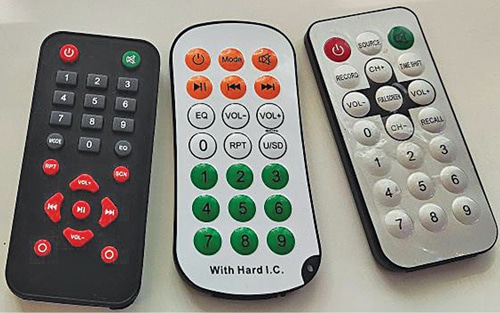
IR Remote Control
The IR remote control normally comes along with the Bluetooth MP3 player module. But you can also use some other IR remote to control this MP3 audio player. We successfully tried three different IR remote models, which are shown below.
Audio Amplifier
You can use any audio (power) amplifier having a 3.5mm audio input port.
5V DC Power Supply (USB)
You can use a 5V, 1A, or 2A mobile charger.
FM Antenna
It is not very critical. As the MP3 player module does not come with an antenna, you can use a whip antenna or a single-strand hook-up wire as an antenna. You can check the different types of radio antennas.
Wires and Cables
The project requires a 3-wire cable for audio connection, a 2-wire cable for power supply, and a type-A USB cable. You also need a 3.5mm stereo audio jack with cable for audio output connected to the audio amplifier.
Building DIY MP3 Player with FM Radio
So now that we have collected all the hardware, let’s start assembling the MP3 radio player.
Cardboard
You can use any thick/strong cardboard having a smooth surface for making the cabinet. For a sturdy cabinet, its size should be small. Cardboard DIY cabinets in various sizes are also available on the internet.
To make your own cardboard cabinet, draw the required size for each side of the cabinet on the cardboard using a scale and pencil/pen. After cutting according to the dimensions shown below, place the front, rear, and sides on cardboard of 8.5cm×14cm size. Fix each side on the base using a glue gun.
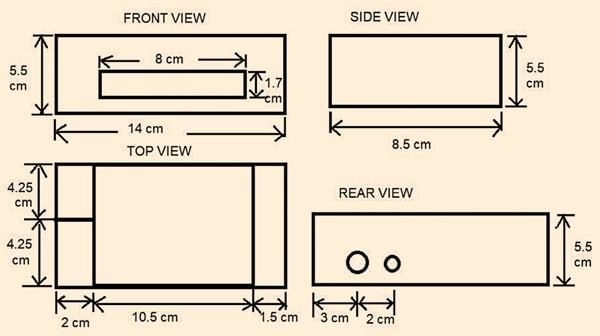
As can be seen from the top view above, the cabinet has four sections or parts. On the left side, there are two 4.25cm×2cm sections, which are to be used for holding the USBs.
These two sections help in keeping the USBs in a vertical position so that they can be picked up easily when needed. The middle section is for holding an MP3 player and the right one is for holding the IR remote.
Next, make two holes on the rear side for connecting the audio and power cables.
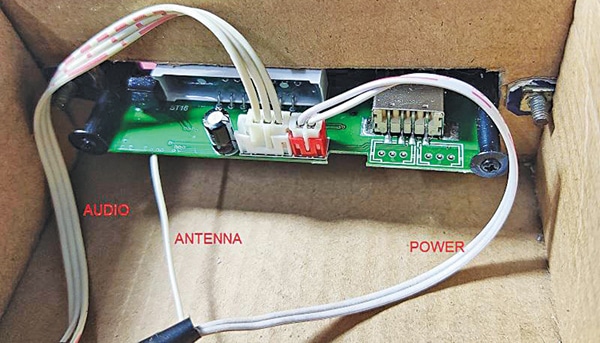
Fixing the MP3 Player Module in the Cabinet
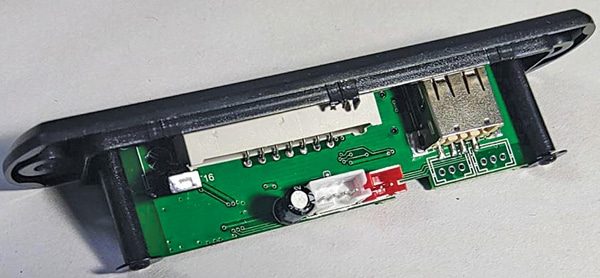
Before fixing the MP3 player module into the cabinet, look out for the antenna point and solder it to the PCB. The internal part of the MP3 player module is shown below.
Fixing the Antenna
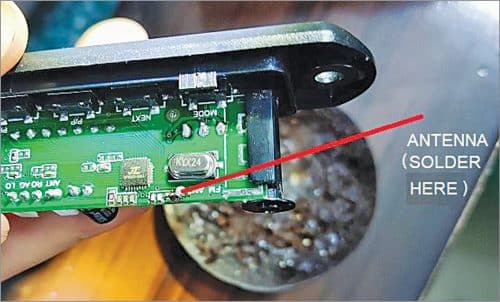
Use a suitable length (say, 10cm) of single-strand hook-up wire as an antenna. The connecting point for the antenna in the MP3 module is not clearly visible. A hole for soldering the antenna is also not provided in the PCB.
However, if you look carefully at the MP3 board on the other side, you can locate the antenna point for soldering, as shown below. You can solder the antenna wire here using a 25W soldering iron. All soldering work should be done before fixing the MP3 module in the cabinet.
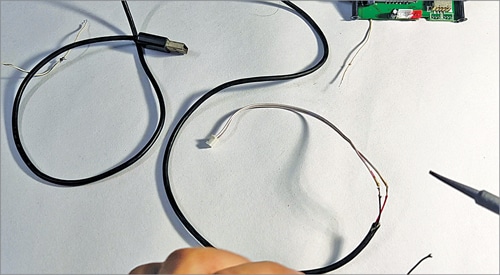
Soldering the Cables
Before connecting the audio and power cables in the MP3 player module, you need to connect the audio cable to an audio jack and the power cable to a USB type-A cable for external connections.
Therefore, solder all the cables to respective connectors and wrap them with cello tape.
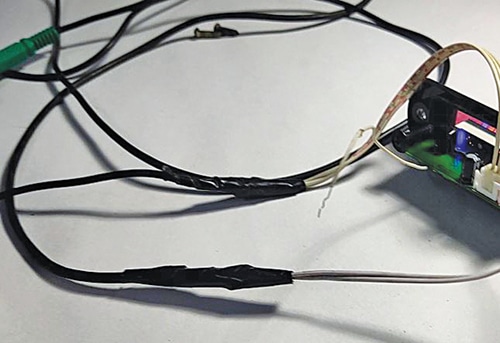
Connecting the Cables to the MP3 Player
The 3-wire cable is used for stereo audio connections, the 2-wire cable is for power supply connection, and the single-strand cable is for the antenna.
Note that there is a 4-pin top entry header on the PCB of the MP3 module. But the module comes with a 3-pin wire for stereo audio connection.
You should connect it to the first three pins of the 4-pin header from right towards the 2-pin red header connector for the power supply. The last pin is left unused, as shown below.

Before fixing the module to the cabinet, ensure everything is working properly. When you change the mode in IR remote, it should change to five modes one by one: bt (Bluetooth), USB, FM, SD, and AUX.

Fixing the MP3 Player in the Cabinet
Fixing the MP3 player module in the cabinet is a no-brainer. From the front side, insert the module into the 8cm×1.7cm slot cut out in the cabinet. Fix it using nuts and bolts. Connect the cables inside the cardboard cabinet.
All the cables can be extended to different points from the holes provided on the rear side of the cabinet. You can connect to an audio source or amplifier through a 3.5mm multiport audio jack.
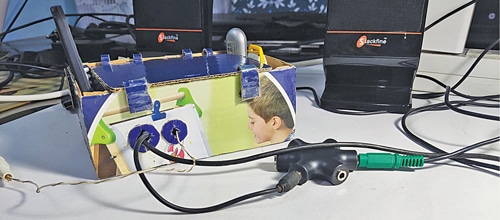
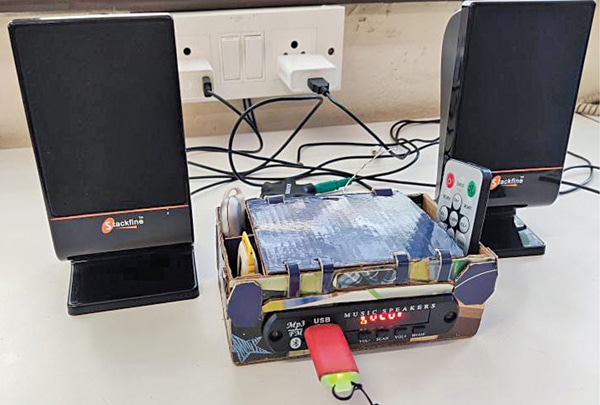
The complete assembly of the Bluetooth MP3 player with an FM receiver is shown in the last image. The MP3 player module can be powered by connecting it to a 5V DC USB power supply.
Its output can be connected to an audio amplifier or amplispeaker to start listening to music. A small desktop stereo speaker system was used to test the prototype.
The MP3 player module has USB and MicroSD ports to play MP3 files. Audio from a mobile phone or laptop can be listened to by connecting through Bluetooth. FM radio can also be listened to.

The MP3 player can be controlled using IR remote or control buttons provided on the front panel. It also has an AUX (auxiliary) socket, which can be plugged into a 3.5mm standard jack headphone connection.
So this is the end of the tutorial but if you face any issues while making it on your own, please feel free to ask in the comments below.
Sani Theo, a technical editor at EFY, is an electronics enthusiast and circuit designer
