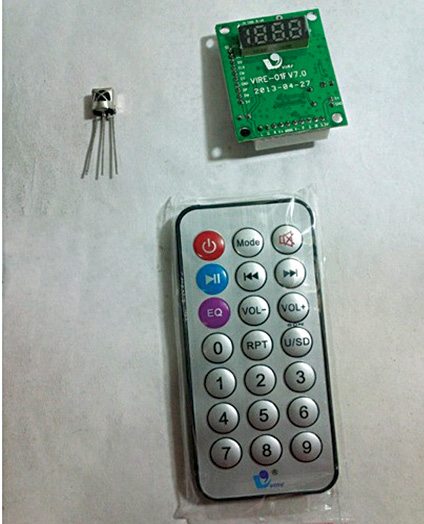
If you go to the market to buy an USB MP3 player, it will cost around 500 rupees or more. But you can assemble one for yourself for 150 rupees or less. All the components, including the module, are readily available as a kit form with many electronics spares shops.
In this article you will find instructions to assemble and use the USB MP3 module supplied by Shenzhen Vire Silicon & Technology Co. Ltd, China. The module comes with a remote control also for users’ convenience.
Table of Contents


Components You’ll Need for Your DIY Project
This versatile module features USB player, SD card player, FM player and an auxiliary input. Besides the USB MP3 module you get two 3.5mm female jack sockets, USB female cable or port, IR receiver and 5V regulated DC supply in the kit for this DIY project.
Connection Guide: Wiring Your Components
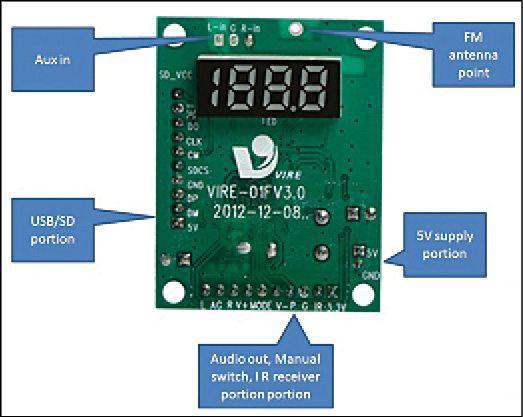
Here we will discuss all the features that have been tried and tested successfully, except for the SD card holder connections, as this feature is rarely used. Connect the following points to the USB female connector:
- GND – Ground
- DP – Data Plus (+)
- DM – Data minus (-)
- 5V – 5V supply
Connect audio out and IR receiver portion as indicated below:
- L – Left channel audio out
- AG – Analogue ground
- R – Right channel audio out
- G – Ground for IR receiver
- IR – IR out of the IR receiver
- 3.3V – 3.3V supply for IR receiver
Almost all the IR receivers have their IR, GND and Vcc pinouts facing the receiver from front. The manual switch connections are optional; these can be connected using tactile switches to ground:
- V+ – Volume Plus
- Mode – Mode (USB/Aux/FM)
- V – Volume Minus
- P – Play/Pause
Connect a regulated +5V to the point 5V and GND. Connect the aux in connection as shown:
- L – Left channel audio in
- G – Analogue ground in
- R – Right channel audio in
An antenna can be connected to the point shown for the FM reception.
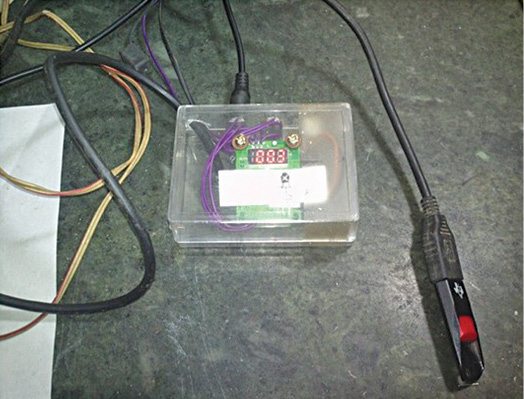
Simply follow the connections as indicated above, then connect the output to any PC multimedia speaker, and enjoy your music!
Check other interesting DIY Electronics Projects
The author is a B.Tech in electronics and communication engineering. Currently, he is an R&D manager at BB Power Tech, India. He likes exploring new circuits.


i m facing problem with this kit can you help to solve it
Could you please elaborate your query?
Why it show SCH ON DISPLAY
searching for source
Mine is not playing USB. But shows the song no. Plays AUX and FM but not USB it reads but doesn’t give any output
connect all grounds together.
Where to buy these PCB
i am from chennai
any online store?
Ritchie Street
does it has internal amplifier or need extra external one?
It requires an audio power amplifier to be connected externally.
i want to buy this kit , suggest me where to buy this kit, thank you.
@ Karthicraja : You can buy the components from kitsNspares.com.
i need circuit principle of MP3 +hardware
its works thank u so much
i want more home/medical applience project
I need the connection diagram or the connected parts image.
Please do send me the same
you have nothing to do ckt drg. just complete the ckt and enjoy music.
Hi Rahul,
The connection diagram is actually not required if you can go through the text carefully.
SCH ON DISPLAY solution
Please send full video
Can i use fast forward features on this decoder board, vire mp3 decoder with AU6210hd controller
What are the uses of GPIO pins
Will u Pls provide me the connections for SD card with this kit?
Pls do reply or u can email me-
[email protected]
can any one provide connection details of USB port with pictorial view. I have lost 8 GB USB drive possibly due to wrong connection.
Can u show Sd card connection?
Is there any kit where I can store audio files in flash/any other memory which has to be programmed and cannot be changed by end users ? A read only audio player
What you need that is PlayList which is programmed one’s requirement. Further you can store audio files (mp3) in alphabetical order like A1, A2, A3,… B1, B2, B3 etc. All the songs will be played sequence-ally one-after another..
Sd-vcc
Det
Do
Clk
Sdcs
This point full information…and work method, please sir
This type of module fails after short time of usage. I purchased 3 such kits for my home use but all those started having problems mainly Failing to detect usb drives while the FM and Aux in functions remained Ok. I found that the Panel type modules have better longivity and all the connections to the board comes completed. Also the display is bigger with Time elapsed function. One has to only connec Power and Audio wires.
Hi,
does anyone know where to get 30pic USB MP3 Player VIRE -01F V3.0
Guenter
How much this module costs and where can i get it from
can we disable radio in this kit?
I have purchased more than 30 such kits and made full working with USB and bt. now recently i got 15 nos out of which 5 got problem with this there is no voltage at IR(3.3 normally) display does not work i have cheked voltage at USB which is correct 5v means up to 5 volt system is workin but than after display and IR is not working. Can anyone help me for repair
Sir i want to remove the voice prompts from the usb MP3 player
its not available in https://www.kitsnspares.com/
where can I get this??
i have a old module having square SOC A166101.1 1250TRZ, w/o bt everything works fine, but now sometimes when i insert sony walkman usb mp3 player it shows usb-PC on the led display, what does mean,can i use this module as a usb sound card, i even connected a straight usb cable to module & pc didn’t see that message on the module.
Can the system be used without remote and IR receiver?
Comparatively this board is old but the new VIRE board available in the market can be operated without IR remote. However, the use of IR remote is much more convenient and can access the full functionality of the board.
very useful article
Thank you for your valuable feedback
Anyone to show me data and clock line for chinese mp3 player ic,that will control ic pt2313
Display shows PC, what it means?
Could you please elaborate your query?
Which button is for scanning stations?