


AI cameras are everywhere—spotting people, detecting objects, and powering advanced driver assistance systems in cars. But most are too bulky and power-hungry for compact applications like drones, wearables, or wildlife tracking.
This device demonstrates how machine learning can be embedded into a tiny package—perfect for places where size, power, and real-time intelligence matter.
POC Video Tutorial:
By using TensorFlow.js with the COCO-SSD model, the camera identifies people, vehicles, and animals directly within a browser, combining intelligent software with minimal hardware. This serves as the foundation for designing one of the smallest AI streaming cameras.
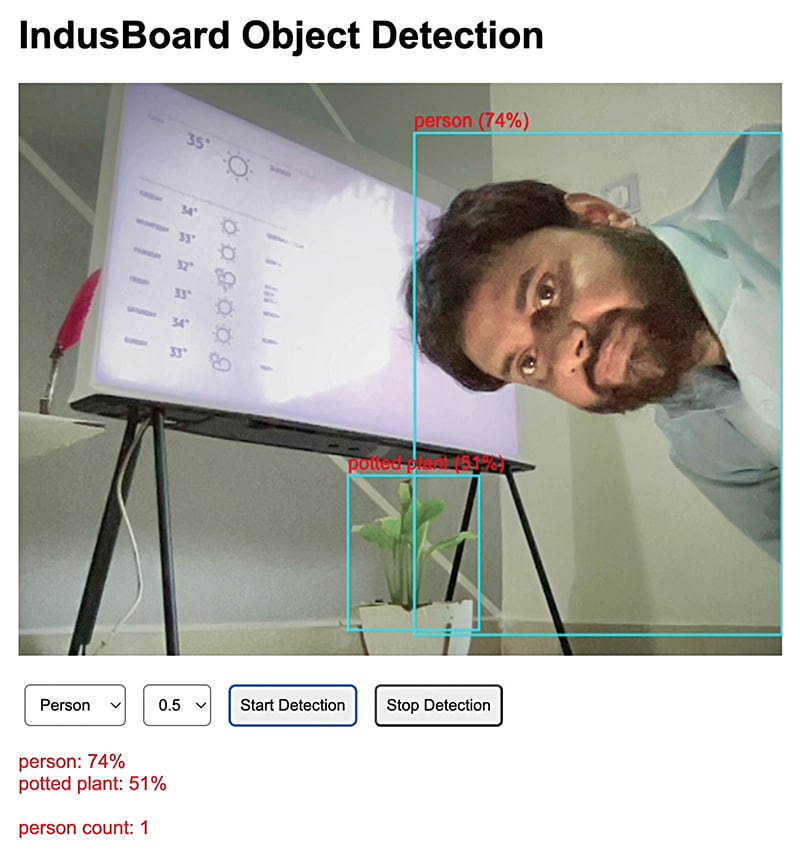
Fig. 1 shows the author detecting a person and a potted plant during testing.
| Bill of Materials | ||
| Item | Remarks | Quantity |
| IndusBoard Coin V2 | Tiny board | 1 |
| OV2640 camera module | 2MP camera with JPEG output | 1 |
| Jumper wires | For hooking it all up | 15 |
| Power supply | 3.3V battery or USB adaptor | 1 |
| Micro USB cable | For programming and power | 1 |
Why go small?
Compact AI cameras offer clear advantages across diverse sectors.
In drones, they lower payload while supporting obstacle detection and object tracking. In wearables, they integrate discreetly into glasses or badges to deliver real-time visual feedback. In home security, they enable unobtrusive surveillance. For wildlife monitoring, their size allows placement in tight or concealed spots such as birdhouses. In robotics, they serve as visual inputs for navigating constrained environments.
These use cases require devices that are intelligent, low-power, and exceptionally compact. A development board meeting all three criteria—capable of capturing frames, streaming video, and maintaining a minimal footprint—was essential.
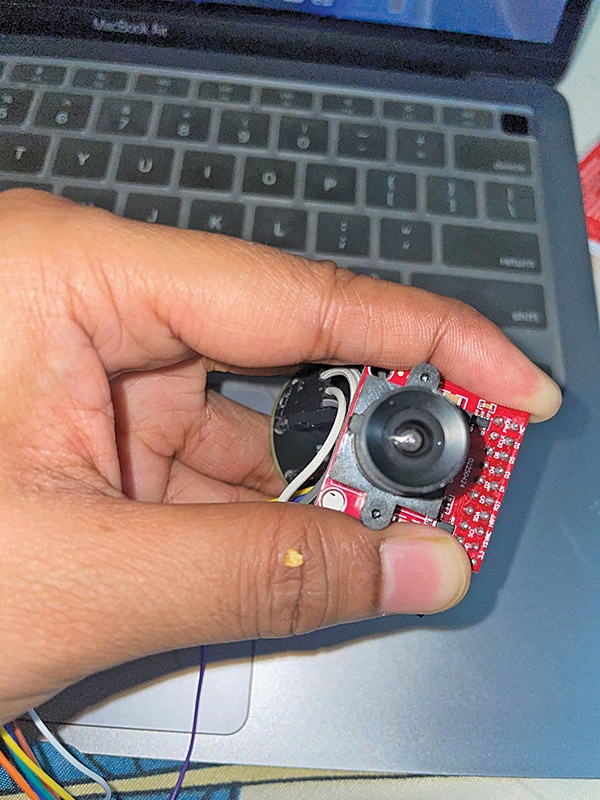
The IndusBoard Coin V2, just 3.3cm across (approximately coin-sized), was chosen for its compact design and built-in sensors. The Bill of Materials table lists the components used; Fig. 2 shows the assembled prototype.
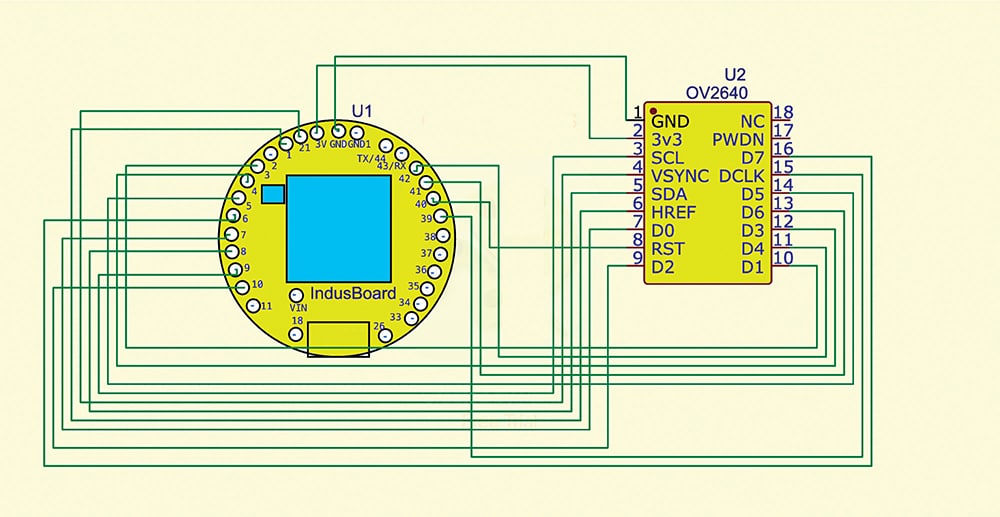
Circuit Diagram
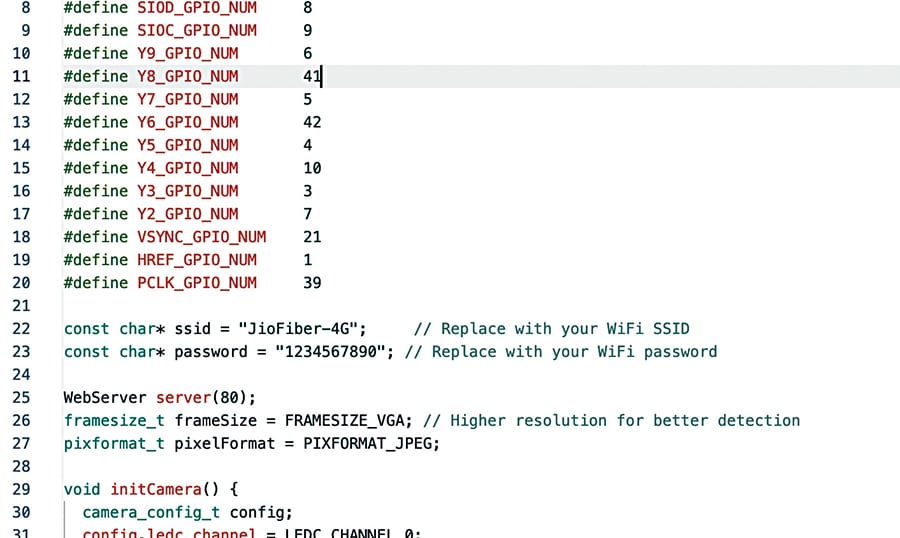
Fig. 3 illustrates the wiring between the IndusBoard Coin and the OV2640 camera module. Key GPIO pin connections include:
XCLK (GPIO 44): Supplies a 20MHz clock signal
PCLK (GPIO 39): Synchronises pixel data
VSYNC (GPIO 21): Indicates the start of a new frame
HREF (GPIO 1): Denotes the beginning of each line
Y2 to Y9 (GPIOs 7, 3, 10, 4, 42, 5, 41, 6): Carry 8-bit pixel data
SDA (GPIO 8) and SCL (GPIO 9): I²C communication lines for camera setup
RESET (GPIO 2): Resets the camera module when required
After the connections are established, the IndusBoard functions as a Wi-Fi server. It captures frames from the OV2640, compresses them as JPEGs, and streams the video feed to a connected phone or computer.
For real-time object detection, a browser-based TensorFlow.js application using the COCO-SSD model overlays bounding boxes on detected objects such as people, animals, and vehicles.
Techy bits: pins, DVP, and PSRAM
The OV2640 camera communicates via a digital video port (DVP), transmitting image data using eight parallel lines along with synchronisation signals. This interface integrates well with the ESP32 platform. The IndusBoard Coin’s 4MB PSRAM is critical for buffering image data, as the internal 320kB SRAM is insufficient for real-time video processing. The PSRAM ensures continuous frame capture and reliable streaming without performance drops.
Programming AI Wireless Camera
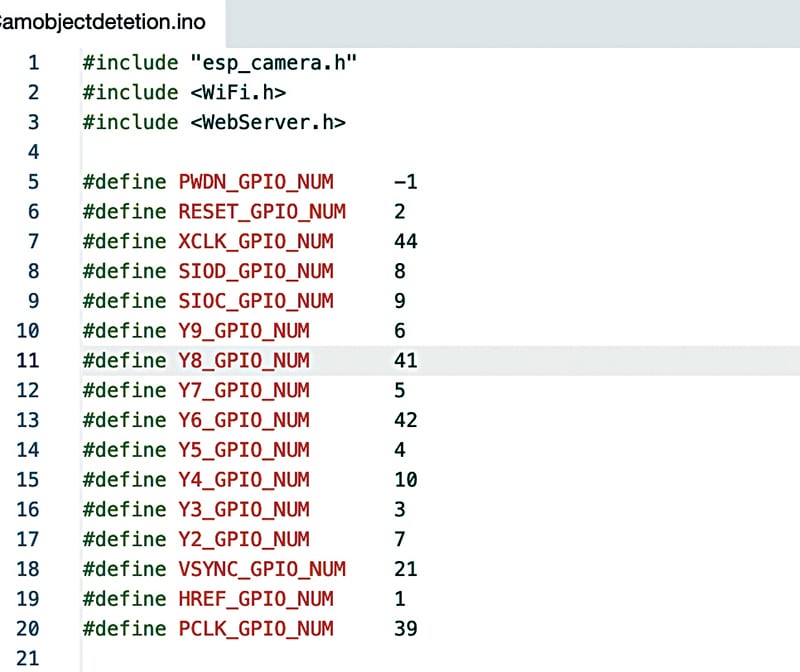
The source code is written in Arduino IDE. With ESP32 board support installed, begin by including the necessary WebServer and Camera libraries. These enable the IndusBoard to operate as a local web server for live streaming. GPIO pin mappings are defined in the initial section of the code, as shown in Fig. 4.
Subsequently, input the Wi-Fi network credentials—SSID and password—into the code to enable wireless connectivity. This allows the video stream to be accessed over a local network. Fig. 5 shows where to input these credentials within the code.
Testing
Once assembled as per Fig. 3 and flashed using the Arduino IDE, the device is powered and monitored via serial monitor to obtain the IP address. This address is then entered in a web browser to access the live stream.
During testing, the camera successfully detected a toy vehicle, a pet, and a human subject. Bounding boxes appeared over the detected objects. Better lighting improved detection accuracy, and adjusting the confidence threshold helped reduce false positives.
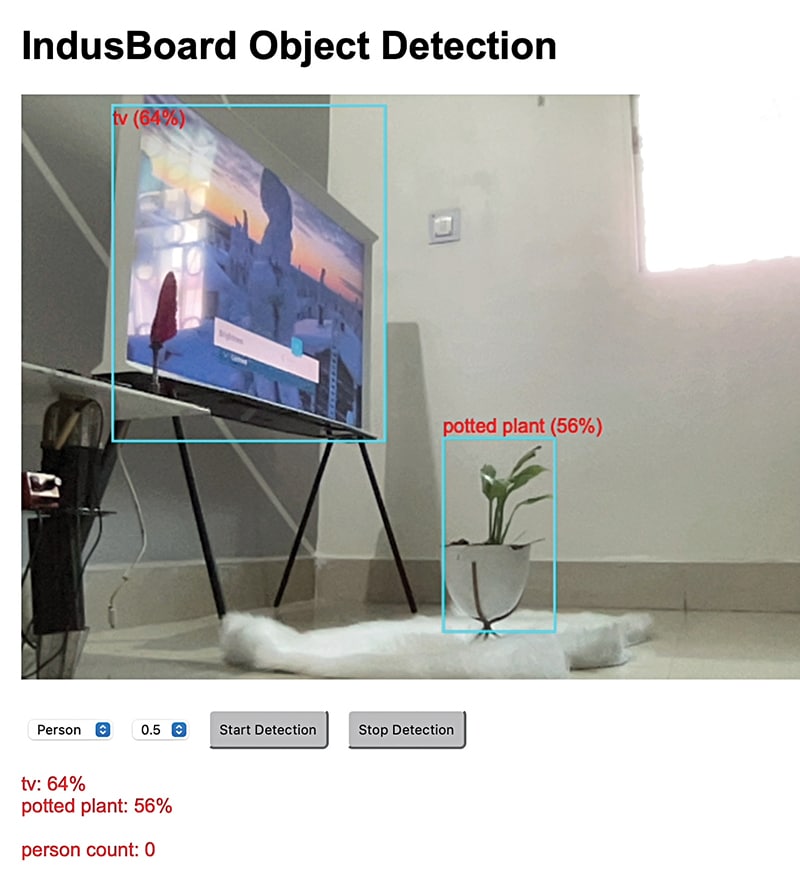
Occasional streaming lag was observed due to Wi-Fi bandwidth limitations, but overall performance confirmed the feasibility of real-time object detection on a device of this scale. Fig. 6 shows the camera identifying a television and a potted plant simultaneously.
Bonus: Below you can check the step-by-step video tutorial to make this wireless camera
