The indoor mapping and positioning feature of a Robot Operating System (ROS) controlled robot is essential in navigating through a hall, warehouse, room or in any other environment.

Since many find it difficult to get started with a ROS and make a ROS-based robot, in this project you will learn how to develop one that is equipped with a 4K LiDAR and 8m scanning range for indoor positioning.

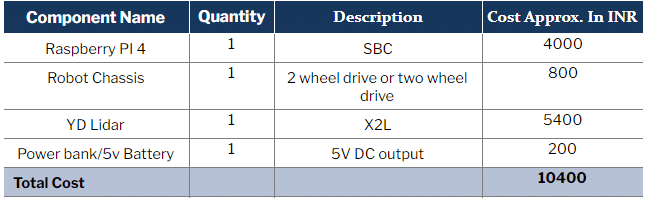
Bill of Materials
Preparing the ROS
For obtaining live 3D data from LiDAR, set up the Raspberry Pi with a ROS such as the ROS Kinetic, ROS Melodic, ROS Noetic, ROS Indigo and many more. Here we will be using the ROS Kinetic since LiDAR X2L version supports it.
Prepare the SD card with Ubuntu OS. It can be downloaded using https://ubuntu.com/download/raspberry-pi for Raspberry Pi.
Now proceed to install the ROS. If you face any problem or error, you can directly download the pre-installed ROS OS by going to https://downloads.ubiquityrobotics.com/pi.html. You can also manually install the ROS by going through the instructions mentioned at ROS’ official website http://wiki.ros.org/kinetic/Installation/Ubuntu.
As the ROS and Ubuntu OS are now present on Raspberry Pi, you are all set for implementing the LiDAR-based robot mapping and positioning system.
Before proceeding further, make sure to set up the SDK, ROS Driver and YD Lidar Work Space. But if you are using RPI Lidar then you need to set up the ROS.
Next, set up the driver and SDK of LiDAR. Since we have YD Lidar here, install the Lidar SDK using the below command in the LXTerminal and compile the SDK.
git clone https://github.com/YDLIDAR/YDLidar-SDK
cd YDLidar-SDK/build
cmake .
Make
sudo make install
Then create the ROS workspace for the LIDAR. For that, install the ROS driver using the following commands in the LXTerminal.
mkdir -p ~/ydlidar_ws/src
cd ~/ydlidar_ws
catkin_make
echo "source ~/ydlidar_ws/devel/setup.bash" >> ~/.bashrc
source ~/.bashrc
cd ~/ydlidar_ws/src/ydlidar_ros_driver/startup
sudo chmod +x initenv.sh
sudo sh initenv.sh
Now the LiDAR with ROS is ready for use. To view the map and surroundings, also install RIVZ using the following commands in the LXTerminal.
sudo apt-get install python-serial ros-kinetic-serial g++ vim \
Ros-kinetic-turtlebot-rviz-launchers

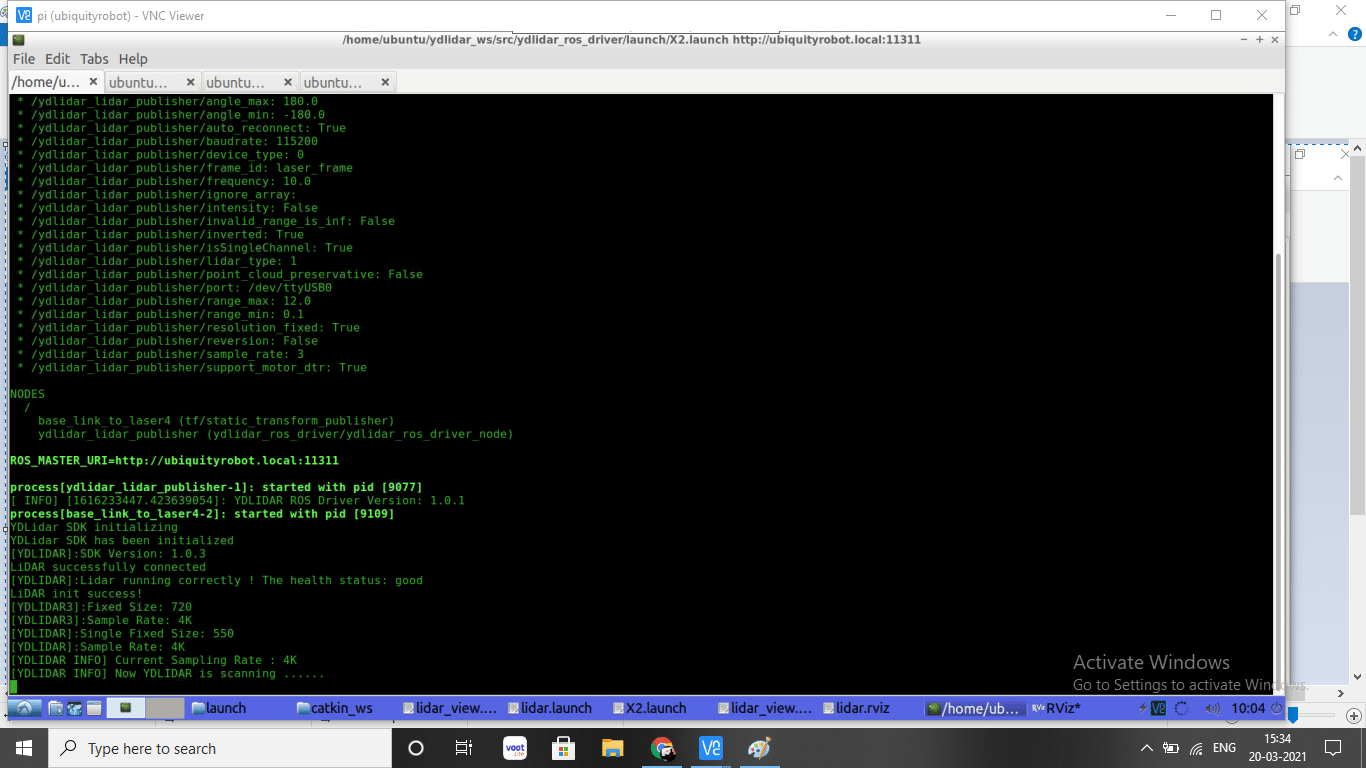
After installing the ROS, you can check the LiDAR and ROS by running the commands as shown above. You will then get a message in Terminal as output LiDAR Health good and LiDAR scanning (check the table below in pdf as output).
Construction
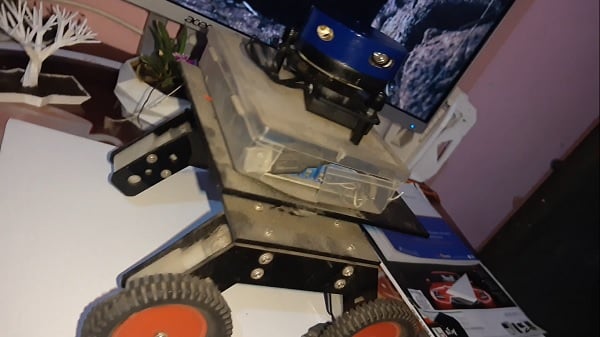
Use a robot chassis that can support the LiDAR weight. Here I am using a 4-wheel drive chassis.
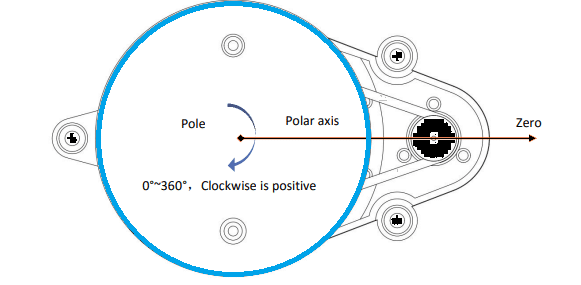
Mount the Raspberry PI electronics battery and LiDAR sensor on top of the robot that will allow smooth and complete room scanning. Maintain the lidar 0 position (as per the chassis type) to obtain the right direction for the robot.
Coding
The robot can be controlled using PHP or a GUI. Refer to the below article to make GUI.
https://www.electronicsforu.com/electronics-projects/hospital-sanitizing-robot
Install the GUI zero library using the command
sudo pip3 install guizero
To run the robot, you need to control the GPIO. For that, install the gpiozero using the command
sudo pip3 install gpiozero
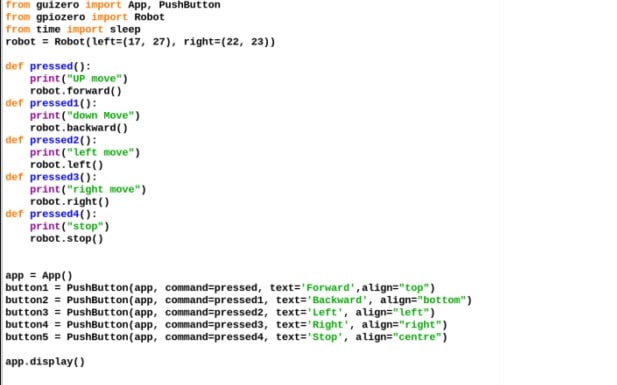
After installing the required libraries, next import the guizero library module and the gpiozero robot module into the code. After that, set the GPIO pins to 17.27.22.23 for controlling the robot.
Now create buttons (5) for the GUI and set their functions.
Setting Cam Stream
To capture live video from a Raspberry Pi camera and display it frame-by-frame on the Raspberry Pi desktop window, use OpenCV.
Then install the VNC server in the Raspberry Pi and VNC viewer on a PC or smartphone. Go to the Raspberry Pi desktop, open the VNC and check the IP address to view the Raspberry Pi screen from a remote PC or smartphone.
Connection
Connect a USB cable to the LiDAR and Raspberry Pi. After that, connect motors to the Raspberry Pi input. Here you can use a motor driver but a voice bonnet that directly drives the motor can also be used.
Testing
Power the Raspberry Pi by connecting it using VNC and then run the GUI or robot control code. Open the LX terminal, start the ROS and perform LIDAR scanning using the given command.
roslaunch ydlidar_ros_driver X2.launch
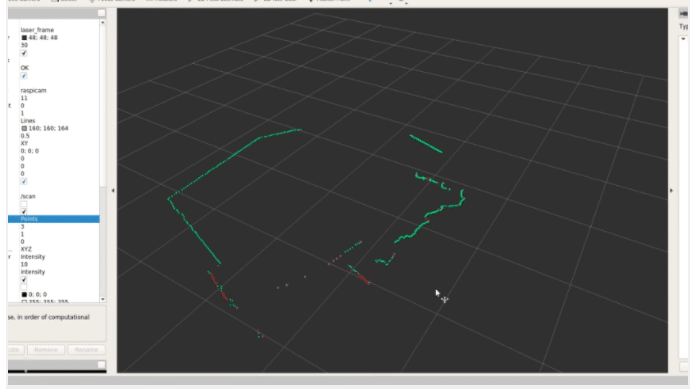
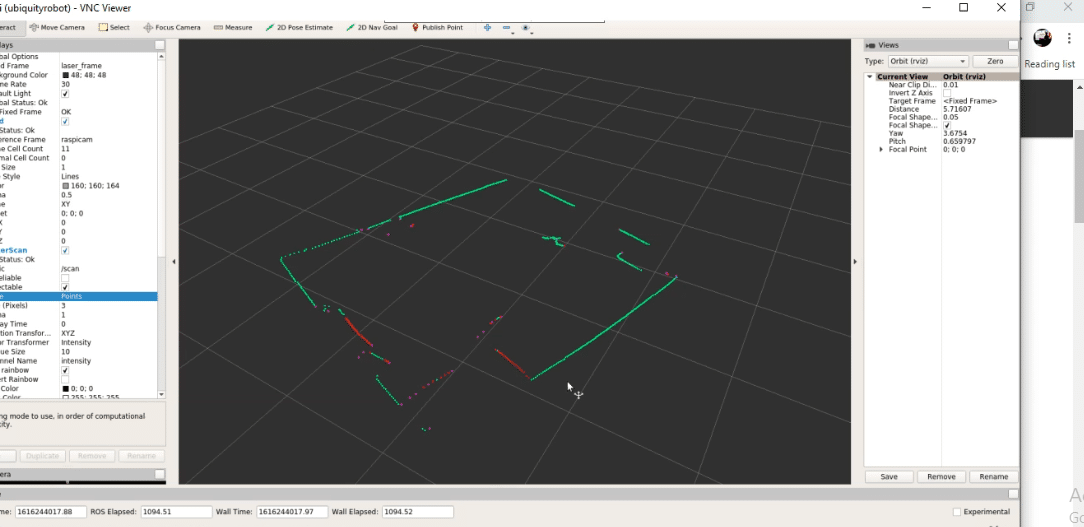
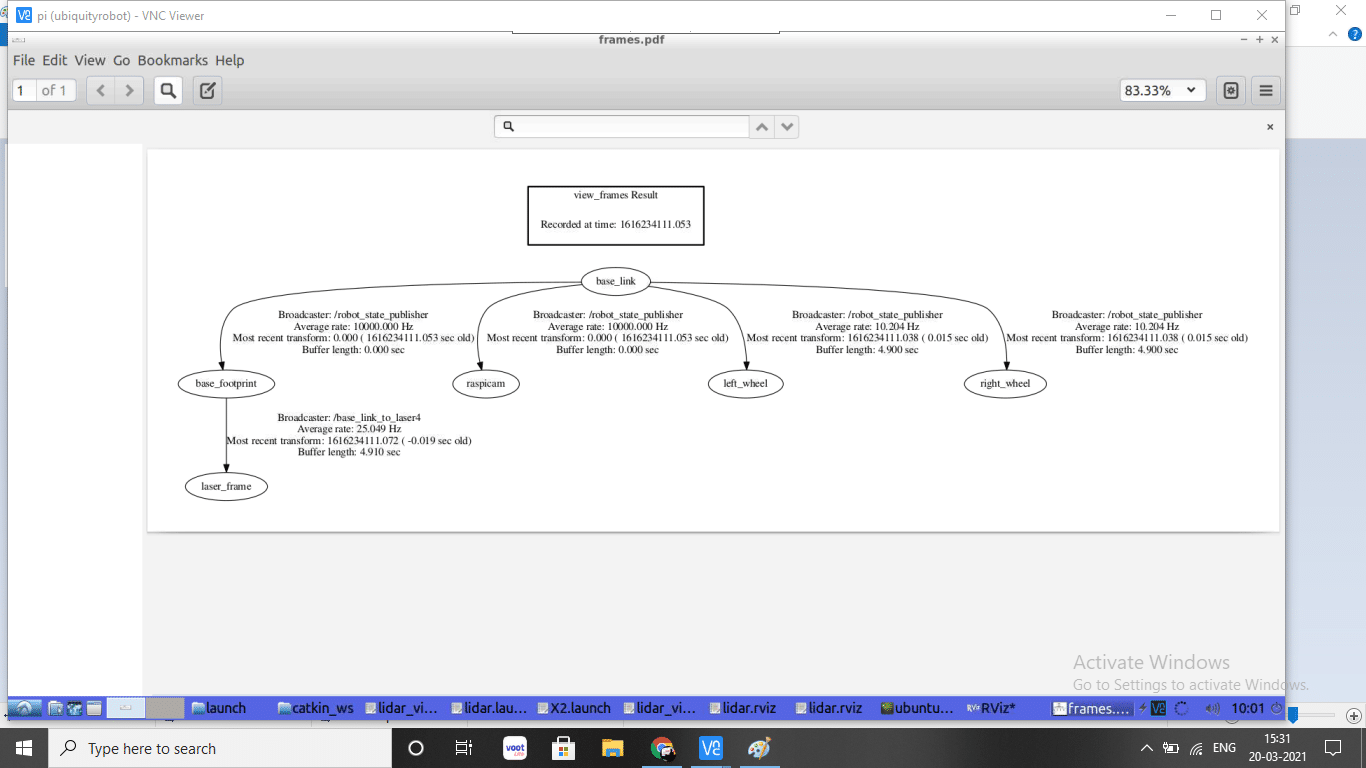
With this, the lidar will start running in the ROS. Next open RIVZ to see the map scanned by the robot. To do so run the command in a new terminal.
rosrun rviz rviz
After this, ROS RIVZ will appear showing the map of the room that also shows the robot’s position in real-time.