Barcode and QR code readers are widely used in inventory tracking, retail billing, office management, and event check-ins. They help identify items quickly and reduce manual work. However, most commercial scanners come as fixed-purpose devices. Many cost between 2,000 to 10,000 and they usually work only as input tools that send data via USB. They cannot easily be reprogrammed for automation tasks or customised workflows. Most also lack built-in wireless data sharing features. This makes them limited for modern applications where real-time data access, automation, and remote connectivity are required.
To overcome these limitations, we built a smart Raspberry Pi based barcode and QR code scanner that can not only read codes but also process, store, and share data in real time over a network. Think of it as a scanner that not only reads information but also acts like a mini server that remembers and shares everything it scans.
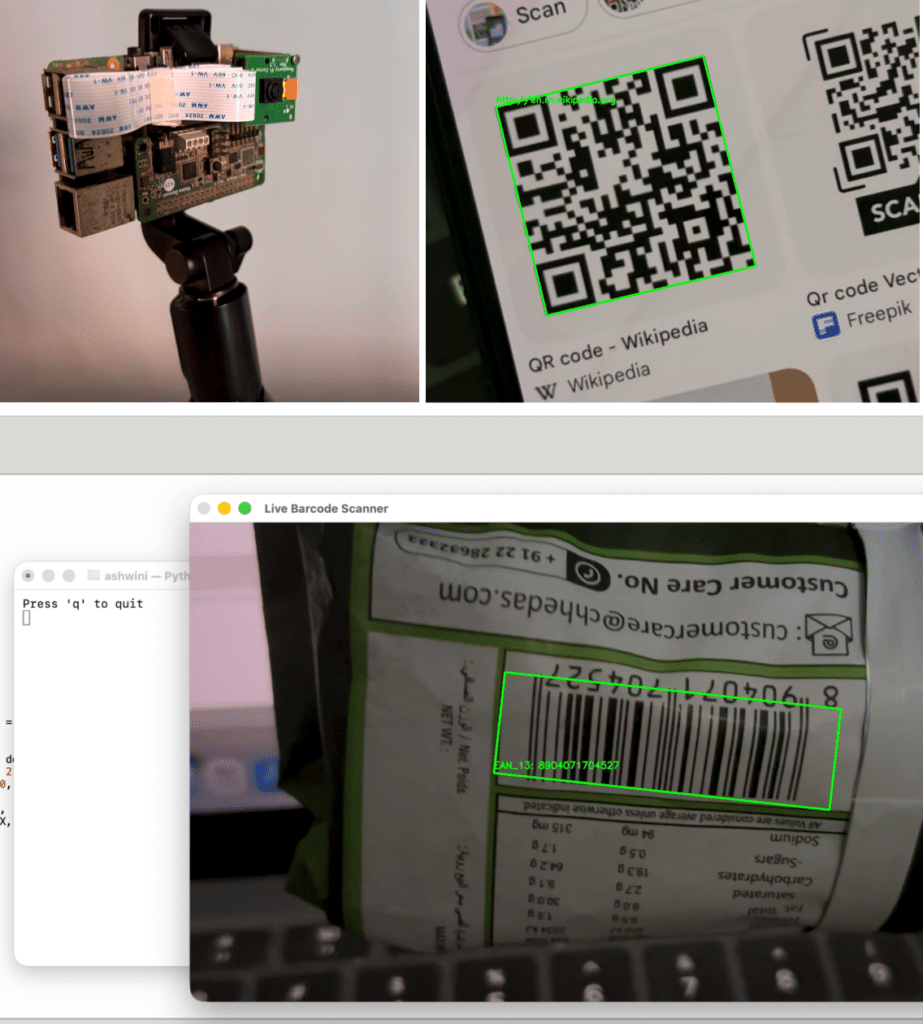
Bill of material
| ID | Component | Specification | Quantity |
| 1 | Raspberry Pi 4 | 2GB RAM with 16GB min storage | 1 |
| 2 | RPi camera | 5 to 10 MP camera CSI | 1 |
| 3 | Ribbon on cable | Ribbon on cable connector for RPI cam | 1 |
| 4 | AC to DC power adapter | 5v 2A | 1 |
Coding Raspberry Pi QR Code Scanner
The Raspberry Pi usually comes with Raspberry Pi OS pre-installed. If not, it can be installed using the official Raspberry Pi Imager tool. The Python IDE is also pre-installed with the OS image. If it’s not, it can be installed with the Python IDE.
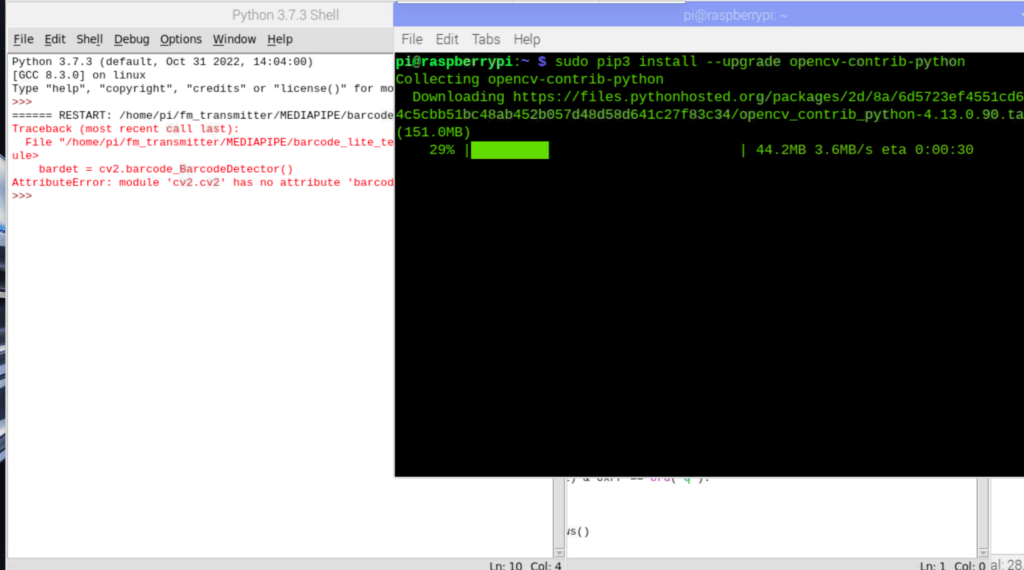
To detect the QR codes and barcodes in real time, access to the camera’s video frame is required, and it is then processed for barcode and QR code detection. There are several Python libraries available for this purpose, but the latest OpenCV comes with pre-defined algorithms that make it easy and smooth to process the frames. The first step install OpenCV by running the code in the terminal:
sudo install opencv-python.
Next, install Flask for API support:
sudo pip3 install flask.
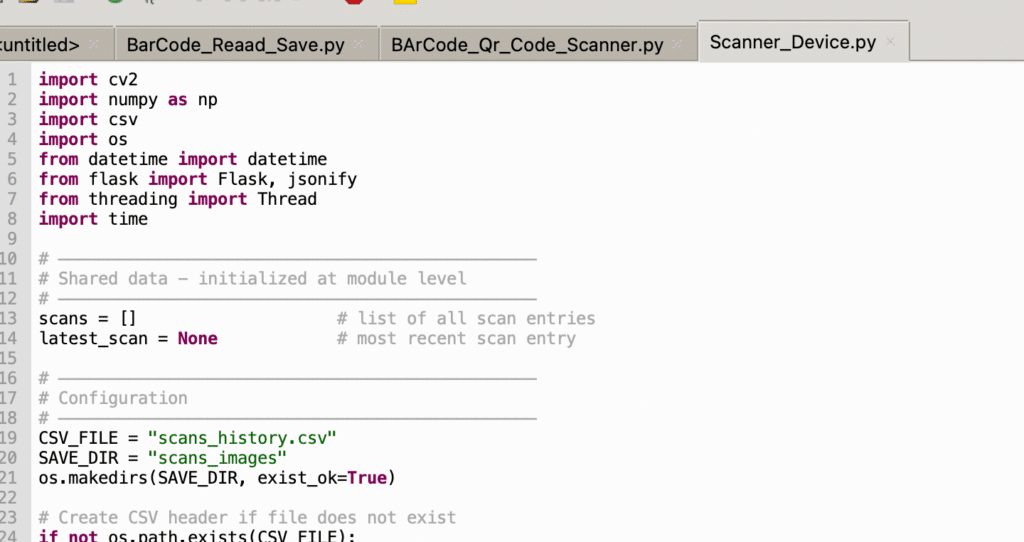
Import the Python module for image processing and the API function. Then set the path and file name where the scanned image will be stored locally on the device and the database CSV path. If it’s not defined, simply use any path, and the code will save the image and database in the same folder where the code is saved.
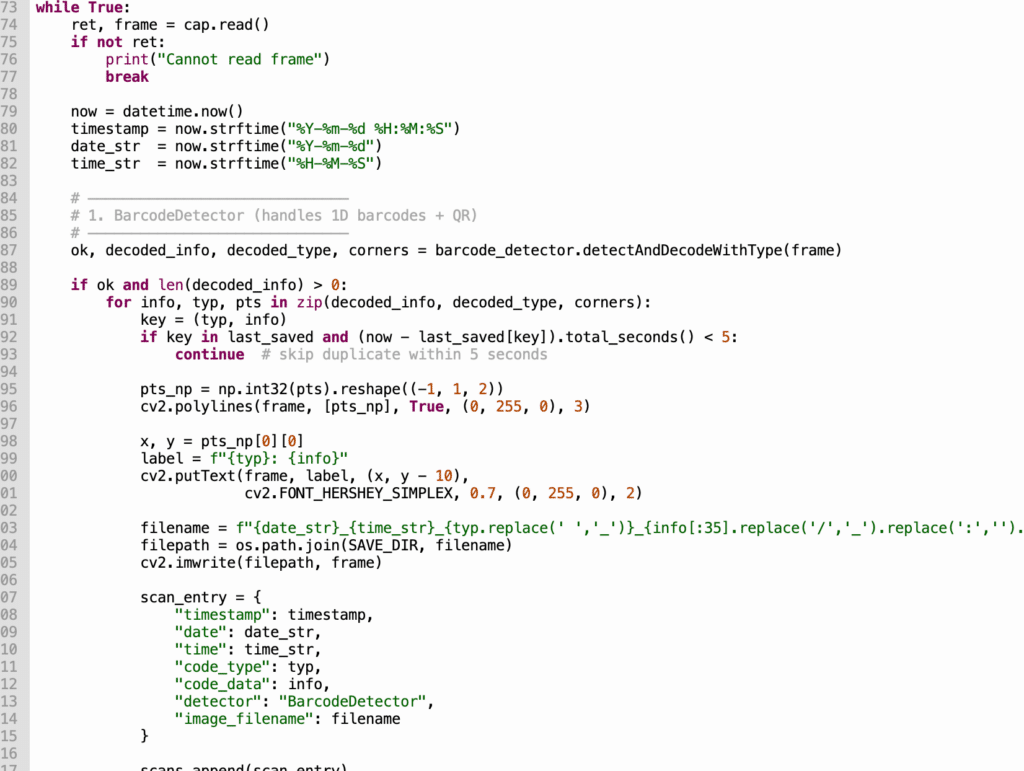
Next, use OpenCV to capture camera frames in real time and process these frames continuously. Firstly, identify the type of code detected in the frame — whether it is a QR code or a 1D barcode. Once the type is determined, attempt to decode the code and retrieve the decoded message, which works for both barcodes (such as EAN-13, Code 128, Code 39, etc.) and QR codes.
After successful decoding, save the extracted data along with a timestamp (including date and time) into a CSV file for permanent logging. At the same time, the code will capture and store an image of the scanned code (with the detected outline and decoded text overlaid) in a specified folder, using a filename that includes the timestamp and part of the decoded content.
In addition to local storage, the system starts a lightweight web server (using Flask) in the background. This server provides a simple API that allows any other laptop, tablet, or device connected to the same local network to wirelessly access the scan results without any physical connection. The API provides two main endpoints:
- /latest (GET request) — Returns the most recent scan result in JSON format, including the timestamp, code type, decoded data, detector used, and the filename of the saved image. This endpoint is ideal for real-time monitoring or live updates from client devices.
- /all (GET request) — Returns the complete list of all scans performed since the program started, also in JSON format, with full details for each entry (timestamp, date, time, code type, data, detector, and image filename). This is useful for reviewing historical scans or exporting data to other applications.
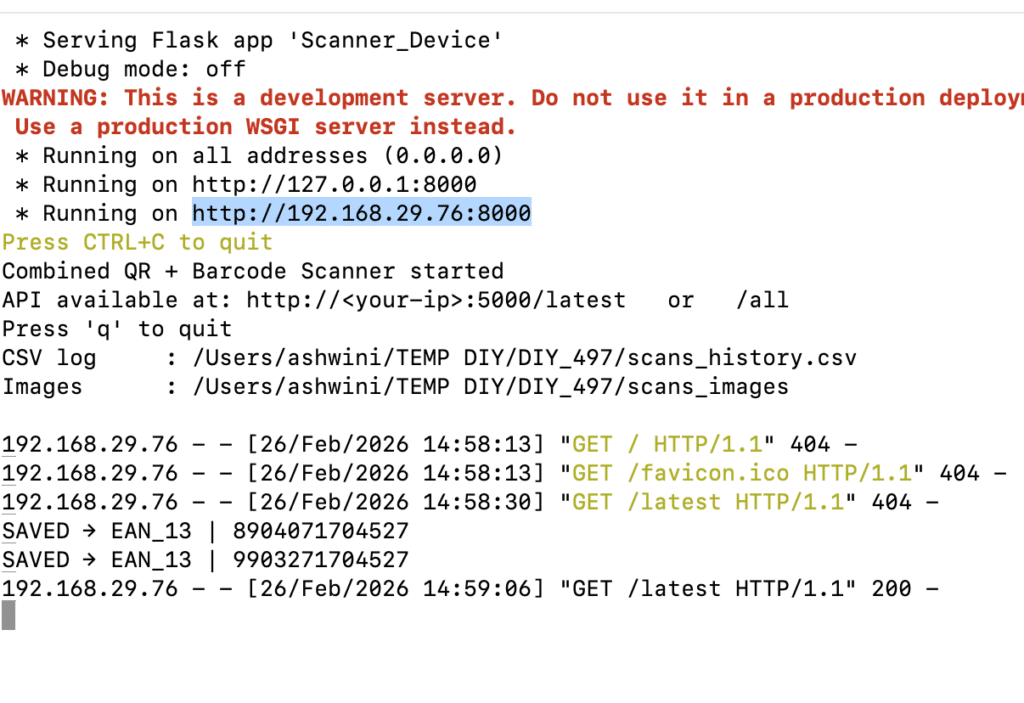
Any client device on the same Wi-Fi network can simply open a browser or use tools like curl, Postman, or a custom script to send HTTP GET requests to these endpoints (for example, http://192.168.1.100:5000/latest or http://192.168.1.100:8080/all — the IP address is that of the scanning device and the port can be customised). This makes the scanner highly shareable in which multiple systems can simultaneously fetch the current real-time scan or the full history wirelessly, enabling applications such as entry/exit logging at gates, shared inventory tracking in warehouses, or multi-device event management — all without needing expensive proprietary hardware or cloud services.
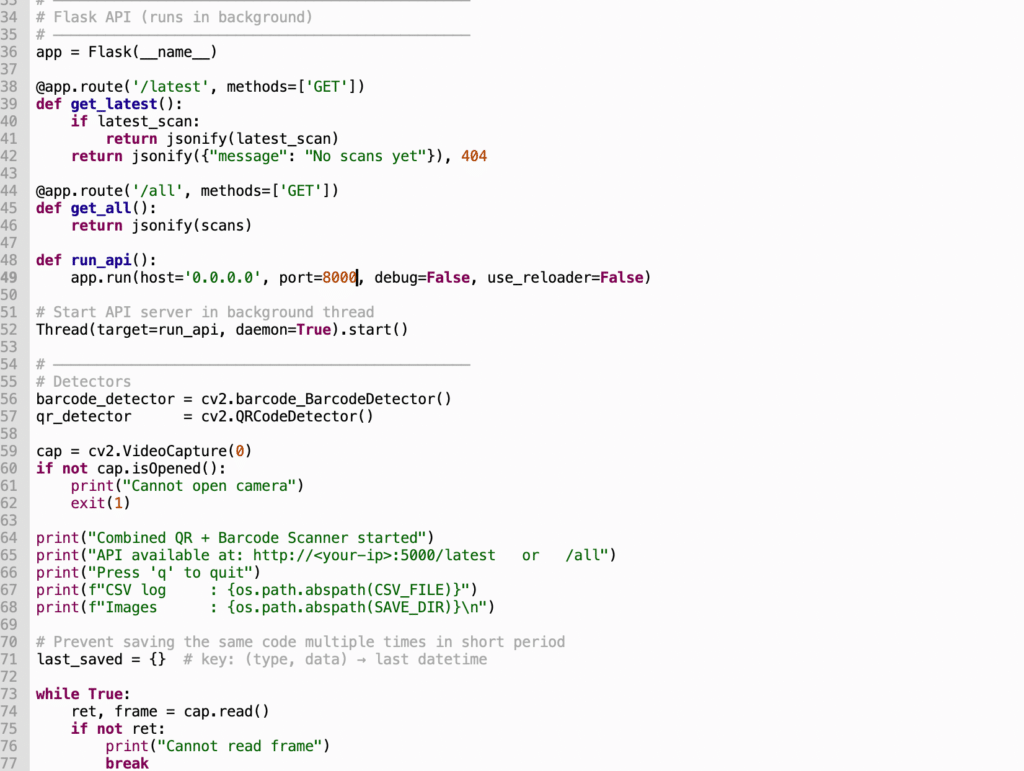
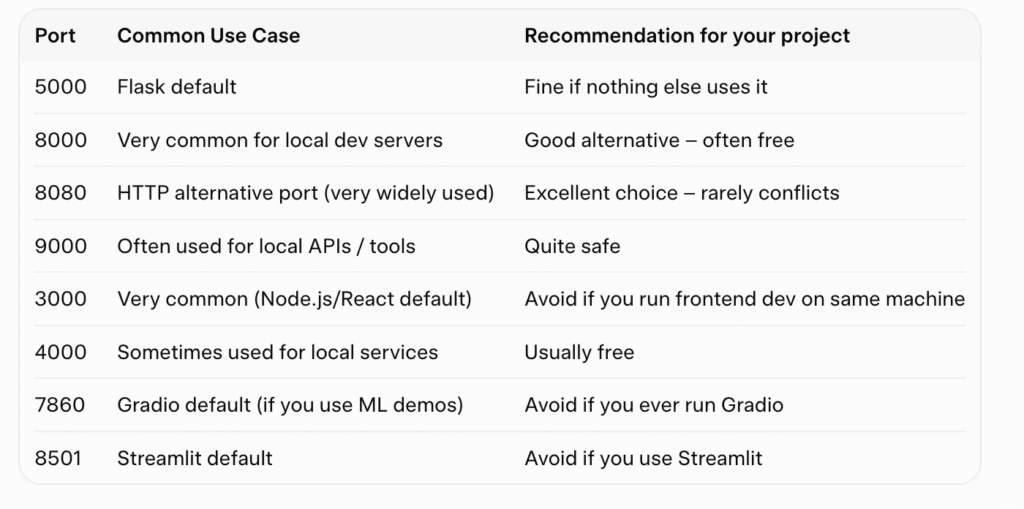
In the code, the default port for the API is set to 5000. However, if that port is unavailable, it can be changed for API access. Here’s a table of port numbers you can configure the code to use for API access.
Check other innovative Raspberry Pi projects.