


 Many areas require continuous monitoring of the air pressure, temperature and humidity to help predict any change in weather and environmental conditions so that we can plan our work accordingly. In several small production units, factories and sporting events we need to monitor air pressure, humidity and temperature levels continuously.
So to accomplish this task in an accurate way, today we will make a smart device that provides us these and related data in real time. For obtaining them, we will use the LPS22HH sensor,
[defineweblang title=”Change Video Language” language=”English,Hindi”]
[getvideolang url= “https://www.youtube.com/embed/B7tB79Mp38M” language=”English”][/getvideolang]
[getvideolang url= “https://www.youtube.com/embed/xxCeQcpbmow” language=”Hindi”][/getvideolang]
[/defineweblang]
STS 751 sensor and HTS221 sensor.
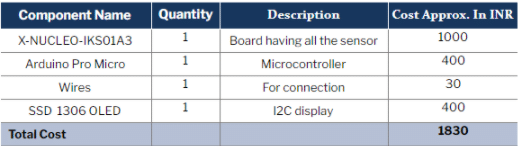
Bill of Materials
To begin this project, collection the following components:
Coding
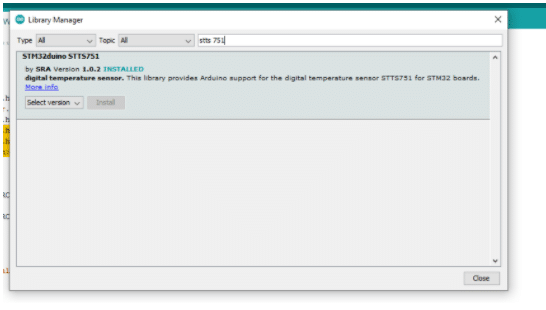
Search the following libraries and install each one of them in the Arduino IDE.
- LPS22HH
- STS 751
- HTS221
To do so, go to Sketch → Include Library → Manage

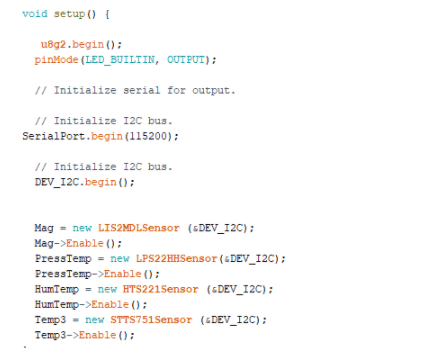
Now include the required sensor library in the code. Here we use the U8g2 lib for the OLED and a few other libraries for sensors.
Next create a setup function where we will initialize the serial power for debugging and for obtaining the sensor values over the serial port. Then start the I2C communication with sensors to retrieve data from them.
After that, create a loop function that will check each sensor and retrieve the data from them. Now use the u8g2 library to display and update the sensor data in real time. This will retrieve the temperature, pressure and humidity data from the sensors and display it on an OLED screen. However, while displaying them on the OLED, ensure that the text corresponding to the data of x and y axes are set in proper places, otherwise all the data and text will overlap each other and hence will not be readable. Therefore if we display the first sensor data at x-axis, place= 0 and y-axis, place=10 then we have to put the next sensor data at 0, 20 so that the text will not overlap and will display correctly below the first sensor data .
After completing the coding part, plug the Arduino Pro Micro and select the right com port number. On the board, select Arduino Leonardo and upload the code to the Arduino board.
Connection
Connect the components as in shown in the circuit diagram.
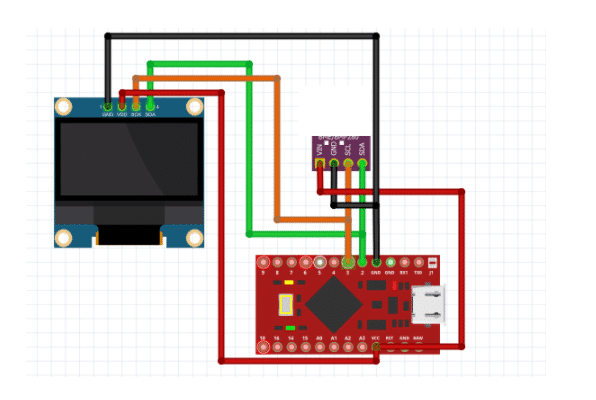
| Arduino | Sensor and OLED |
| PIN 3 | SCL |
| PIN 4 | SDA |
| GND | GND |
| 5V | VCC |
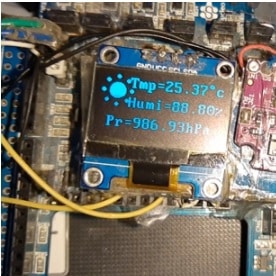
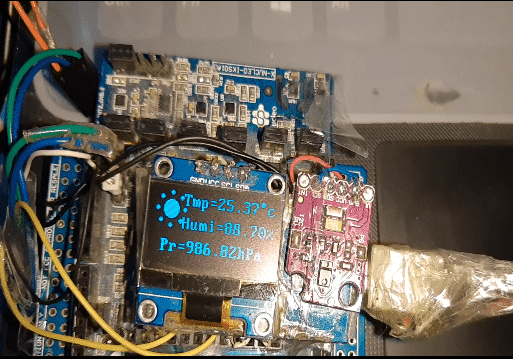
Testing
After connecting, power the Arduino board with a 5V battery. Wait for a few minutes before it starts to show the room temperature, humidity and room pressure.
Congratulations!! You have successfully built a system for monitoring weather and environmental conditions.