


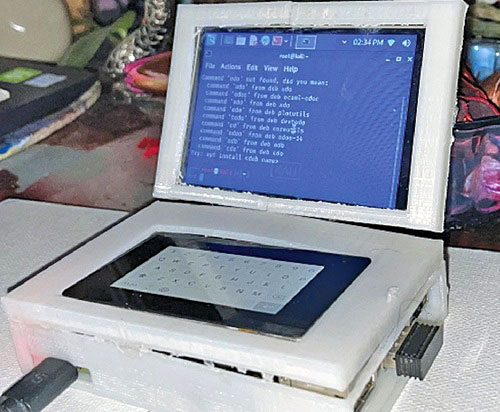
 Carrying a machine everywhere, which is capable of doing ethical hacking without getting noticed is important in some hacking-related tasks for which you may not like to carry a big laptop. So, we build the smallest Raspberry Pi laptop with a full-touch keyboard.
Required Hardware:

Raspberry Pi Laptop Features:
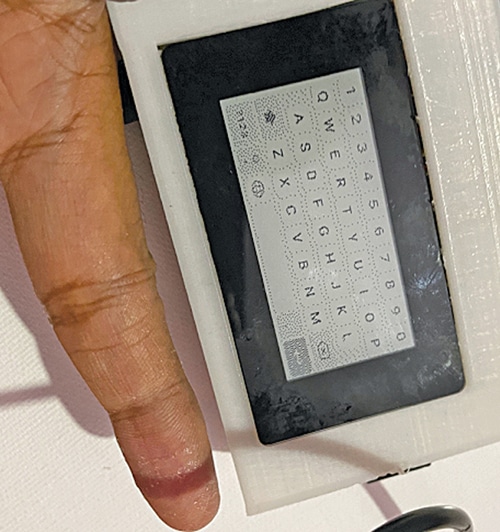
- As small as our finger, portable, and easy to hide and carry anywhere.
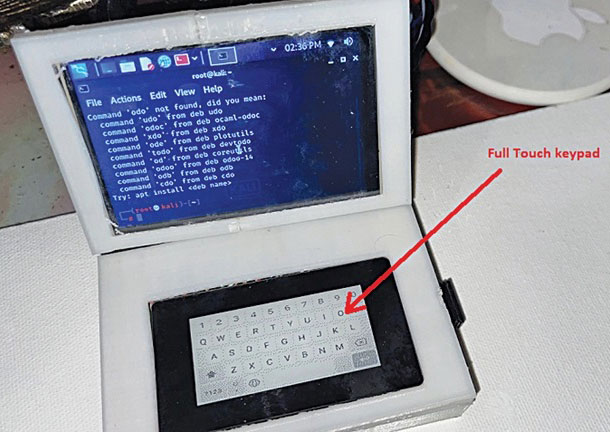
- Built-in full multi-touch keyboard.
- Multi-touch display for working as a hacking tablet.
- Equipped with Wi-Fi, BLE, and Bluetooth connectivity for wireless and network-based exploitation and penetration testing.
Linux is considered to be the best operating system (OS) for ethical hacking and Kali is one of the best Linux flavored OS because it comes with pre-setup of various exploitation tools for penetration, hacking, and testing, such as Metasploit, Aircrack-ng, and Wireshark.
Designing the Laptop
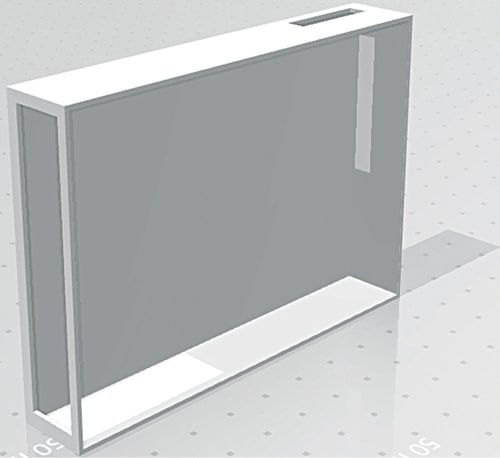
After collecting the components listed in the Bill of Materials, we need to design the case or body of the laptop to hold the hardware inside it safely. We may design the laptop body in three parts.

First is the base part where we keep the main hardware, viz, Raspberry Pi, battery, and charging system.
In the base, we make two cuts: one in front for the Ethernet and USB and the other for power and charging of the battery.

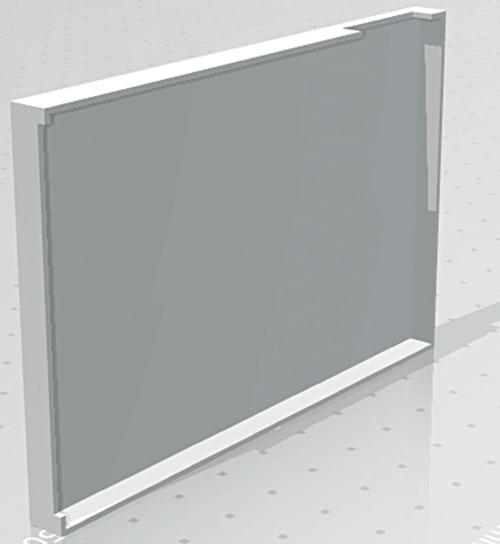
Next, we design the top cover of the base to hold a touch e-paper-based keyboard. We make a cut in the top cover to fix the touch panel keyboard inside it.

Next, we design the LCD panel’s support for the laptop. For that, we make the enclosure the same size as the display and keep the thickness the same as well.

After designing the laptop body, we can 3D print its parts.
Preparing Raspberry Pi for Kali Linux
Before proceeding further, we need to prepare the Raspberry Pi board with Kali Linux. For that, go to Kali Linux’s official website and download its latest version for an ARM-based device like Raspberry Pi.
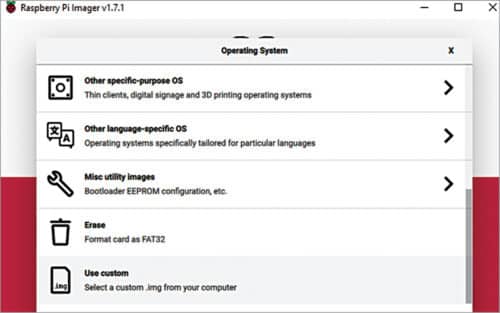
Next, download the Raspberry Pi disk imager and install it. Insert the SD card into the USB drive and prepare it with Kali Linux OS using the Raspberry Pi disk imager by choosing the Kali Linux OS image file in the Raspberry Pi disk imager.
Preparing OS for SPI Display
For our laptop, we can choose any display for Raspberry Pi that is up to 8.9cm (3.5-inch) in size. An HDMI-based touch display is recommended as we are using a touch e-ink display for the keyboard panel, which is an SPI, and two SPI displays can cause conflict in communication.
However, the SPI touch e-ink display used for the keyboard uses only its touch function which is I2C based, so the SPI of other displays does not cause that much of a problem.
An SPI-based display was used in the prototype because it had already been bought, but the use of 8.9cm HDMI touch display is recommended instead. By using the HDMI display, you can skip the following steps (required for SPI display) and go straight to the keyboard preparation section.
To use the SPI display, we need to install the drivers and set up the SPI touch display. So, open the terminal and run the following command in the Linux terminal to install the driver and setup the display for Raspberry Pi:
git clone https://github.com/goodtft/
LCD-show.git
chmod -R 755 LCD-show
cd LCD-show/
sudo ./LCD35-show
After installing the driver, connect the SPI display, and solder the pins to Raspberry Pi as per Table 2.

Preparing Touch keyboard
We need to prepare the keypad system for the DIY Raspberry Pi laptop for giving input to the laptop. As we wish to make a full touch keyboard panel, we are using the touch e-ink display as the touch-based keypad, but we need software to use it as a keyboard.
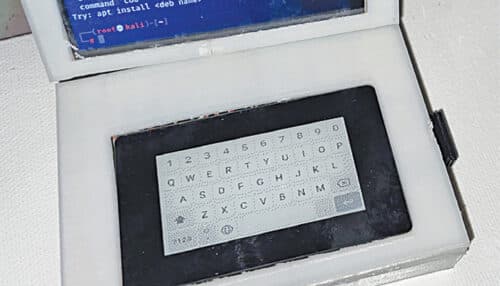
For making the touch keyboard, we need to display the keys on the e-ink display. So, download a vector image having the keys on the keyboard. Resize the image to the size of the e-ink display, then download the library for the touch e-ink display. Here we are using the waveshare touch e-ink display.
So open Linux and run the following command to get the library and driver for the e-ink display:
sudo pip3 install gpiozero
wget http://www.airspayce.com/mikem/
bcm2835/bcm2835-1.68.tar.gz
tar zxvf bcm2835-1.68.tar.gz
cd bcm2835-1.68/
sudo ./configure && sudo make && sudo make
check && sudo make install
sudo apt-get install wiringpi
sudo apt-get update
sudo apt-get install python3-pip
sudo apt-get install python3-pil
sudo apt-get install python3-numpy
sudo pip3 install RPi.GPIO
sudo pip3 install spidev
cd ~
git clone https://github.com/waveshare/
Touch_e-Paper_HAT
Go to Example and run the code to show the image on the e-ink display. In that code change ‘pic’ to the keyboard layout vector image and run the code.
Note: Attach the e-ink touch display with Raspberry on its GPIO pins before running the code and then turn off the Raspberry.
The display will remain with the same image even after power is disconnected until you refresh the display. E-ink display uses a special technology where the ink molecules that are activated electrically remain on the display, like the printed ink on paper.
Next, create the code that will identify the touch points on the touch e-ink display that we touch and convert those keyboard signals to inputs for Kali Linux in Raspberry Pi.
For input signals of the mouse and keyboard virtually, without actually connecting any mouse or keyboard, we have many Python libraries.
In the prototype, we used pynput Python library module to give a virtual keyboard input to Raspberry Pi. So, open the Linux terminal and run the following command to install pynput:
sudo pip3 install pynput
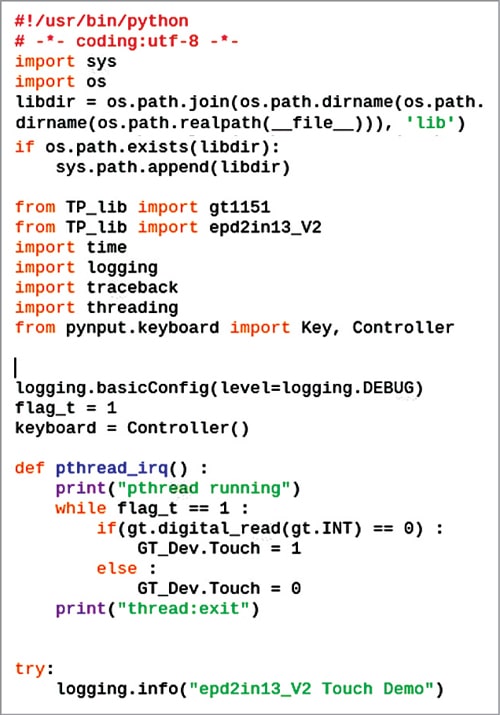
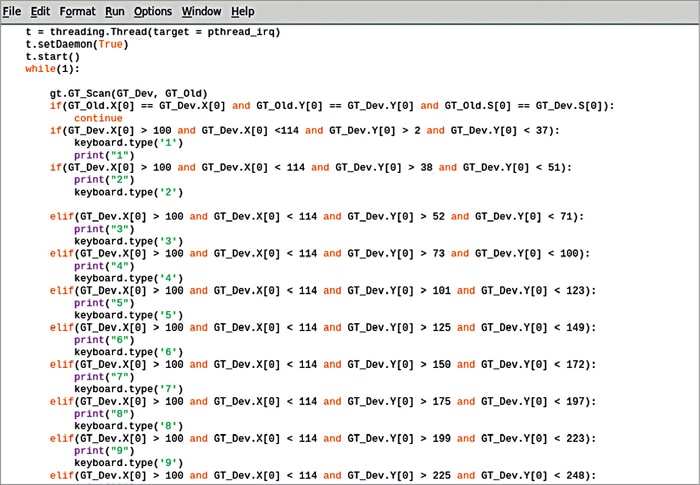
Next, prepare the code that will check the touch points and convert them into key input for each key that we touch on the keyboard.
Import the library and pynput modules for virtual input to Raspberry Pi and check the touch points on the display where we will be touching the e-ink display that is being used as a keyboard.
Next, create a while loop and define the function to use pynput for the keyboard inputs to Raspberry Pi.

Now we need to change the SPI(0,0) of the Raspberry Pi SPI port to a second SPI. Open the lib folder and make a change in the code file of the e-ink touch display by changing to SPI(1,0) in every file where SPI(0,0) is written and save that.
Next, enable the second SPI port of Raspberry Pi by adding the line spi = spidev.spiDev(1,0) in the config.txt file of Raspberry Pi in the boot folder in the root of Raspberry Pi.
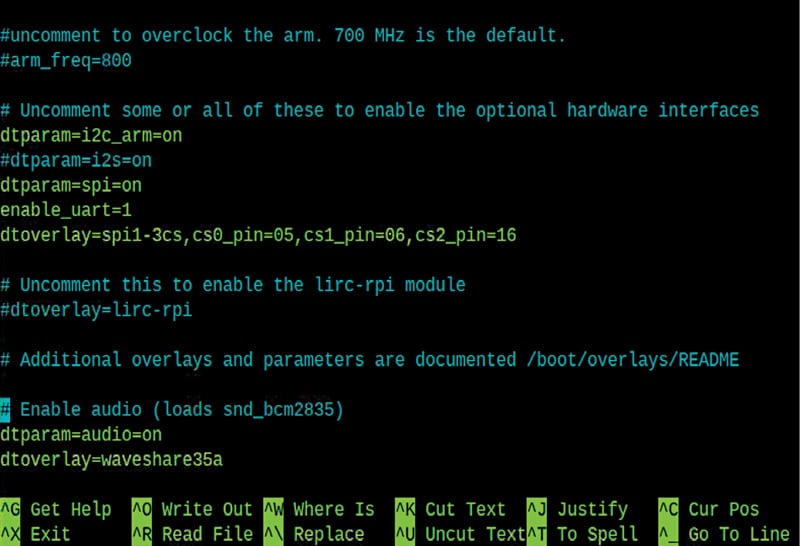
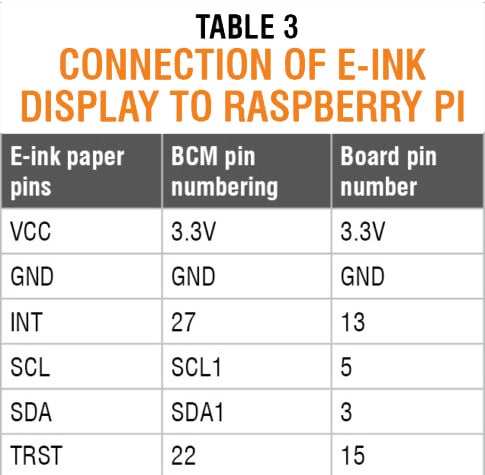
Connect the e-ink display to Raspberry Pi pins as shown in Table 2. As we are using only the touch part, and the touch controller is I2C based, we are connecting the pins of the touch controller of the e-ink display only to Raspberry Pi.
Download E-ink Laptop Source Code
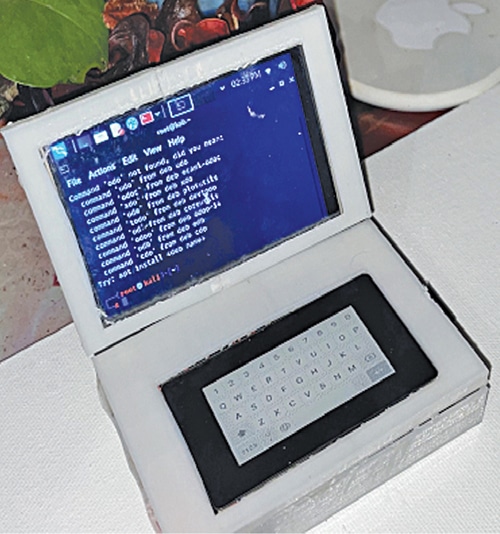
Preparing Raspberry Pi Laptop
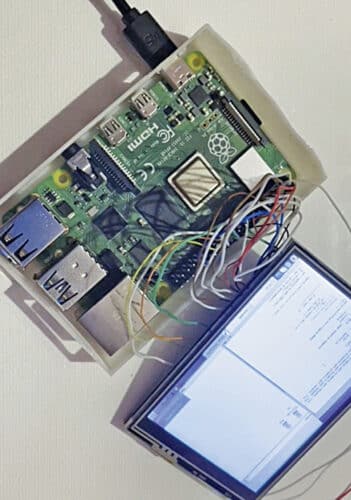
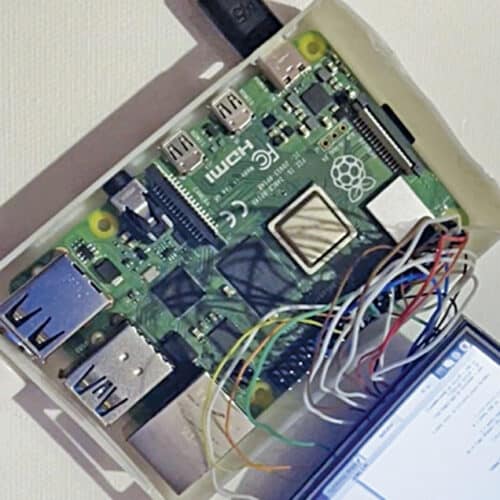
After setting up everything in the library and modules, and connecting the components and soldering, fix all the hardware in the 3D-printed laptop case that we made earlier.
Fix the components, and fit the battery and charging system inside the case, leaving the Raspberry Pi 5V pin and GND pin outside.
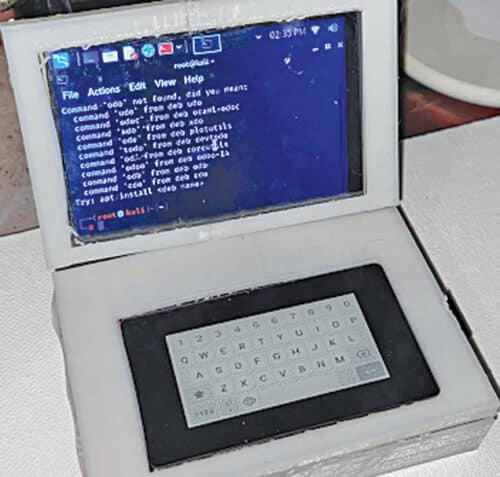
Testing
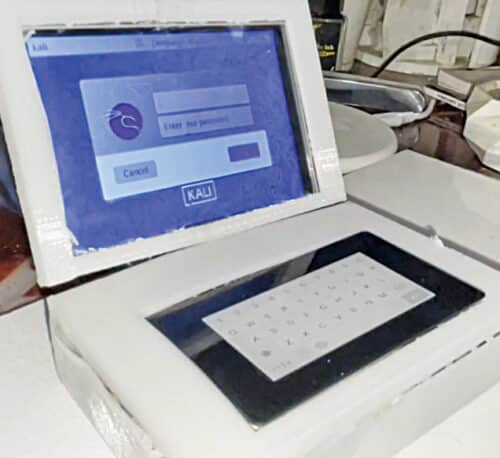
Congratulations! The world’s smallest hacking laptop is ready to show its magic. Power the laptop and run the keyboard code. You are now ready to use it as a hacking machine that is as powerful as a commercially available hacking laptop, in spite of its tiny size.
Here is the demo video…
If you have any doubts or issues while making this project, please ask in the comments below.
We hope you liked the project and learned something new. We have more such interesting DIY projects that you should check for sure.
Ashwini Kumar Sinha is a technology enthusiast
Please note this article is transferred from Electronics For You’s April 2022 Issue and was updated on 06-10-2022. This article was first published online.
