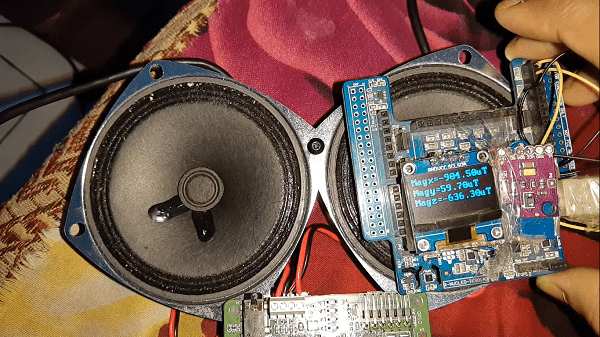
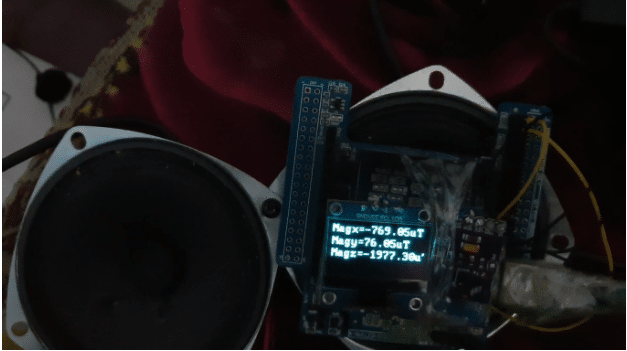
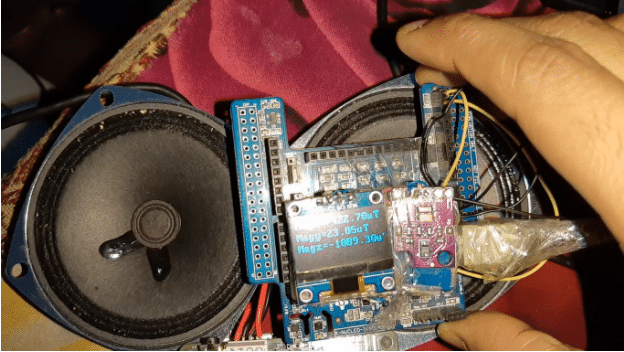
 In engineering, especially electronics, often the magnetic flux is required to be measured around a device. It also has several other applications such as detecting a speaker installed inside a device or locating a wire inside a wall or other areas. Traditional Digital Magnetic Flux Meters only give a 1-D reading and not of the entire surrounding XYZ axis.
So today we will make a simple 3-D Digital Magnetic Flux Meter that gives us reading in all three dimensions.

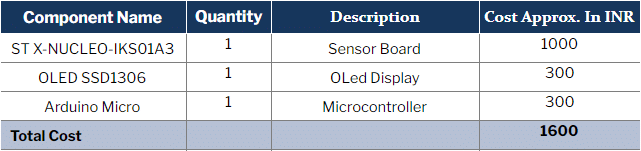
Bill of Material
Coding
In the Arduino IDE, go to the Library Manager, search for LIS2DML library and install it. Next, search for U8G2 library and install it as well. Now you can begin the coding by including the above libraries for retrieving data from sensors and for displaying data on the OLED.
After that, create a setup function where we will need to initialize the I2C connection with the sensor and the OLED
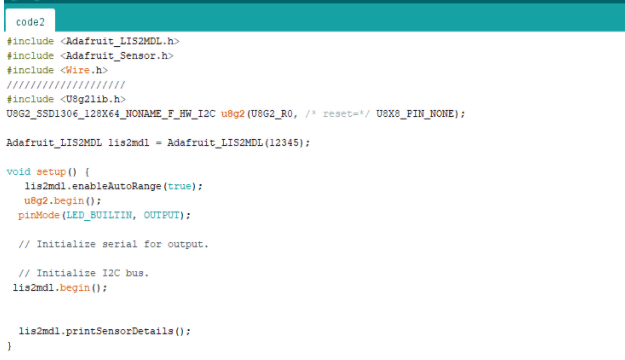
Next, create a loop function, which will clear the display buffer and send a new buffer so that the display data is refreshed each time the loop runs.

Connection
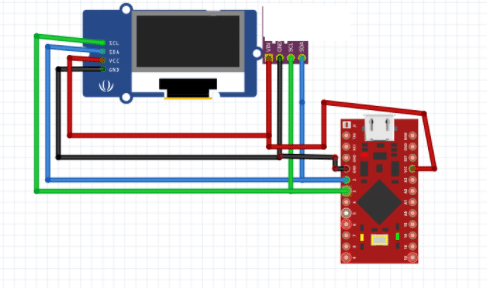
Connect the parts as described in the below connection table and diagram.
| Arduino | OLED and Sensor |
| SCl | SCL |
| SDA | SDA |
| GND | GND |
| 5V | VCC |
Testing
Power the device with a 3V battery. You are now ready to measure the magnetic flux in all three dimensions. The X-axis shows magnetic flux in X plane, Y-axis in Y-plane and Z-axis in Z-plane.