


Flight tracking is fascinating—you can watch aeroplanes move in real time, see their altitude, speed, and even where they’re headed. Many aviation fans and curious people enjoy this, and building your own ground station to track planes makes it even more exciting. It’s not just a fun project, but also a great way to learn about radio signals and air traffic control (ATC).
So how does it work? Aeroplanes send out signals that can be picked up on the ground and turned into maps. With a small computer like the Raspberry Pi and an SDR (software-defined radio) receiver—such as the RTL-SDR dongle—you can set up your own station. If you add accessories like the AirNav RadarBox 1090 ADS-B filter, your station can capture and decode ADS-B signals at 1090 MHz. These signals contain data from aircraft transponders, and when everything is set up properly, you can track flights within 200–400 nautical miles.
The RTL-SDR receiver is popular because it’s affordable and works well with the Raspberry Pi. Software like dump1090 and FlightRadar24’s feeder program processes the raw signals into clear flight information. If you want better performance, you can use filters or higher-end receivers like Airspy or SDRPlay, which give more accurate and reliable results.

But there’s also an easier way. Instead of building your own receiver, you can use data from existing networks like FlightRadar24 or other open-source flight trackers. All you need to do is set up a kiosk-style display and show their dashboard to watch flights in real time.
How It Works?
ADS-B is a cornerstone of modern aviation surveillance, where aircraft broadcast GPS-derived position, altitude, speed, and identification data via 1090 MHz pulses (Mode-S Extended Squitter format) every 0.5-1 second. Ground stations passively receive these signals to provide real-time tracking without traditional radar sweeps.

Key Principles:

Signal Transmission: Aircraft transponders emit PPM-modulated pulses at 1090 MHz, adhering to ICAO standards, allowing unintrusive reception.

Reception: An SDR like RTL-SDR tunes to 1090 MHz, sampling at 2-2.4 MS/s to capture IQ data. The R820T tuner offers a ~3.5 dB noise figure; the AirNav filter enhances SNR with 20-30 dB gain and bandpass (1087-1093 MHz) to reject GSM/Wi-Fi interference prevalent in 2025.

Decoding: Software (e.g., dump1090) demodulates pulses into binary messages, extracting CRC-checked data for aircraft details.

Processing and Display: The Raspberry Pi hosts the decoder, streaming data via TCP/IP to visualization tools (e.g., FlightRadar24 app) or a local web interface at :8080, displaying maps, stats, and MLAT for non-GPS aircraft.

Data Sharing: Feeders upload to networks like FlightRadar24, earning premium access or supporting global aggregation.

Antenna Optimization: Vertical collinear or dipole antennas, tuned to λ/4 (~6.9 cm at 1090 MHz), provide 5-7 dBi gain for omnidirectional coverage.

2025 Considerations: Increased 5G interference necessitates filters; dual-band setups (1090 MHz + 978 MHz UAT) support U.S. regions with additional hardware.
This system delivers a range of 150-300 nm with upgrades, rivaling commercial ATC installations.
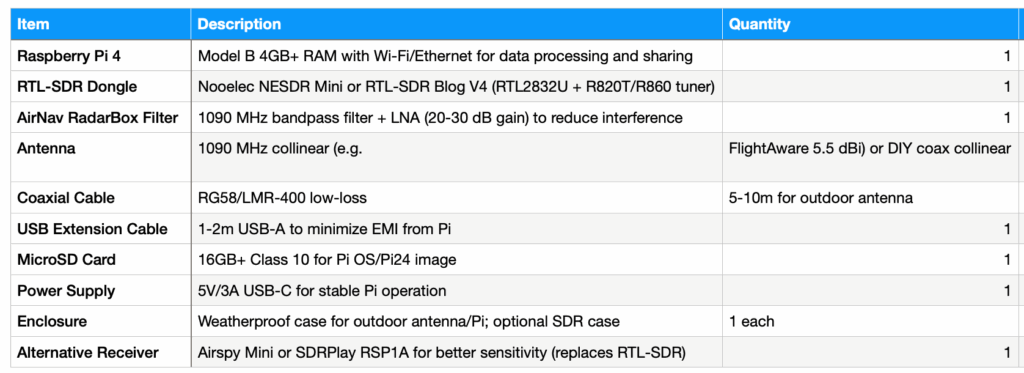
Bill of Materials
The complete components needed are listed in the bill of materials table below.
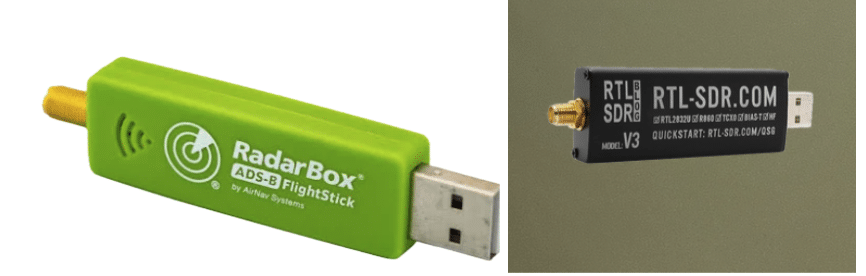
Here, you have two main options: you can either use an RTL-SDR USB module or connect directly to FlightRadar with an antenna. There are several choices available—for example, you could use the FlightRadar Box M or an RTL-SDR USB dongle. Similarly, you can choose from different antenna types, such as the Dipole Antenna Kit or a single antenna kit. Refer to Figure 3 for more details.
Connection
Now, connect the RTL_SDR/Flight radar to the Raspberry Pi USB. Then, connect the antenna to the antenna connector on the RTL-SDR/Flight radar module, as shown in figure 3. Mount the antenna if it’s dipole-shaped on the rooftop, window, or elsewhere. Ensure that it’s positioned to face the sky to ensure signal interception.

Installation and Configuration
There are two main methods to set up the system on different platforms, along with a few other options such as FlightAware Radar using the PiAware OS image. In this guide, I’ve chosen FlightRadar24 and OpenSky, and we’ll go through both of them one by one.
FlightRadar24 Configuration
First, you need to install the FlightRadar24 image to the Raspberry Pi, which is almost preconfigured. You need to download the image using this link.
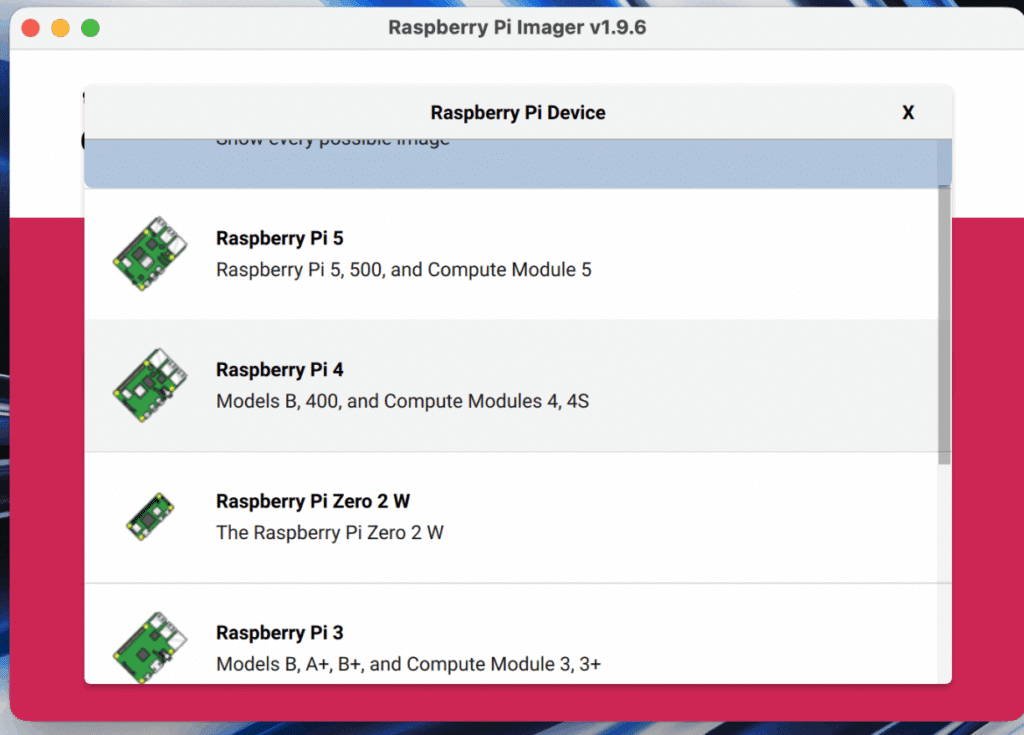
Click on the OS image file (.img) to download it, as shown in Fig. 4. Next, download the Raspberry Pi Imager tool. Open it and select your Raspberry Pi board version (for example, I’m using Raspberry Pi 4). Then choose the Custom Image option, select the OS image file you just downloaded, insert the SD card, and click Flash. This will write the OS image onto the SD card.
Once the process is complete, remove the SD card. To set up Wi-Fi auto-connection, copy the Wi-Fi configuration file into the boot folder of the SD card.
For full step-by-step instructions and more details, you can refer to the video.

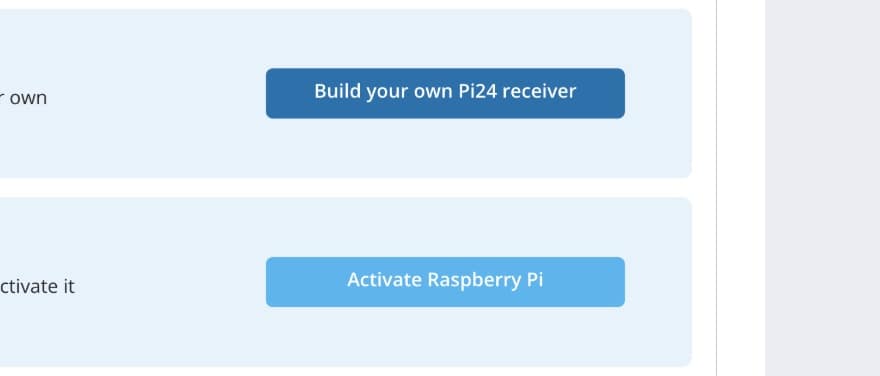
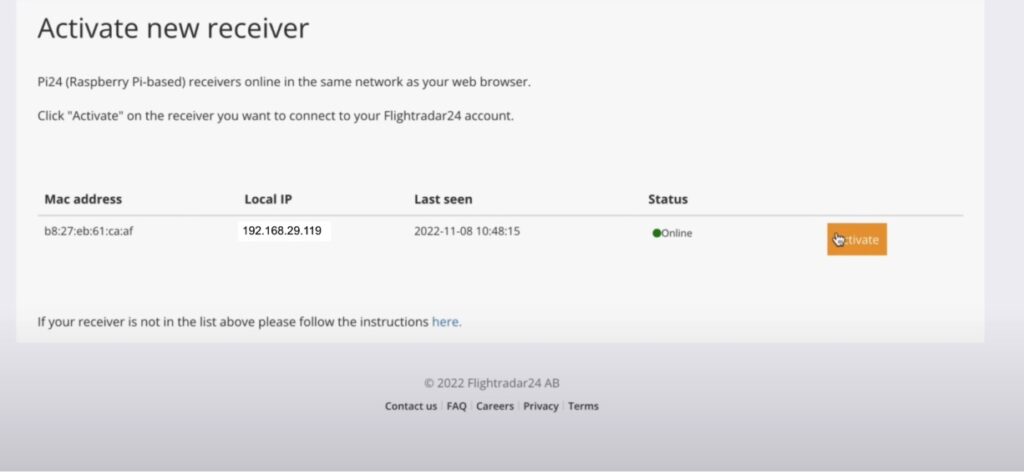
Now, go to this link and click on Share Your Data. If everything is set up correctly and your Raspberry Pi and laptop are connected to the same network, your Raspberry Pi’s IP address will appear on the page. Then, click on the Activate Your Pi option.
You can also refer to the previous video or the instructions on the FlightRadar24 installation page for more guidance.
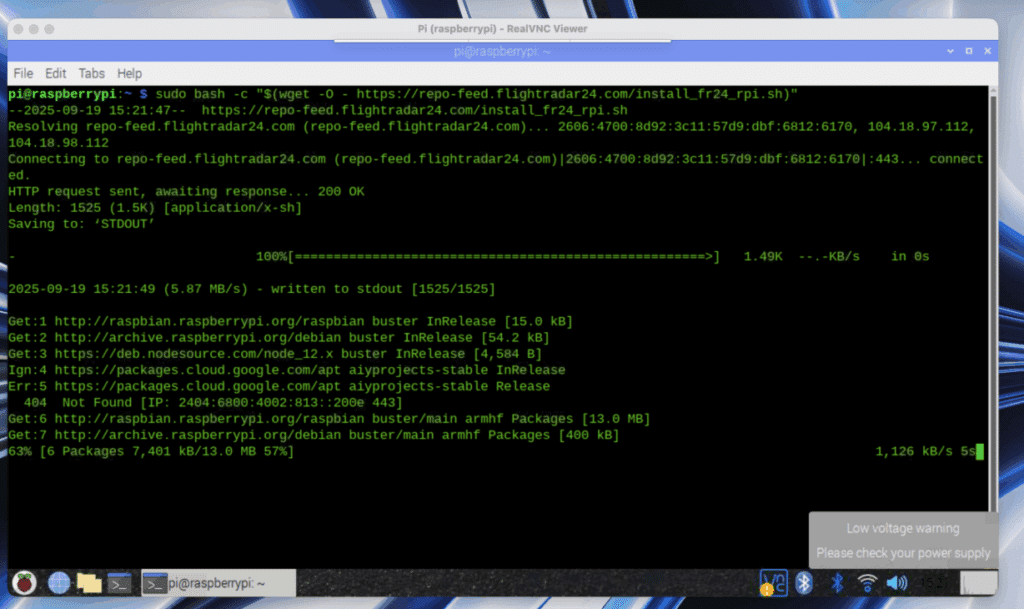
If somehow it didn’t work out, then you can manually install using the Linux terminal by following the steps at this link.
Now open the flighttracker24, and there you go, you can see the data.
OpenSky Configuration
Another flight tracker feeder is OpenSky. You can either download the preconfigured OS image for OpenSky from this link and flash it to the SD card like we did earlier, or you can install it manually on your existing Raspberry Pi OS using the Linux terminal.
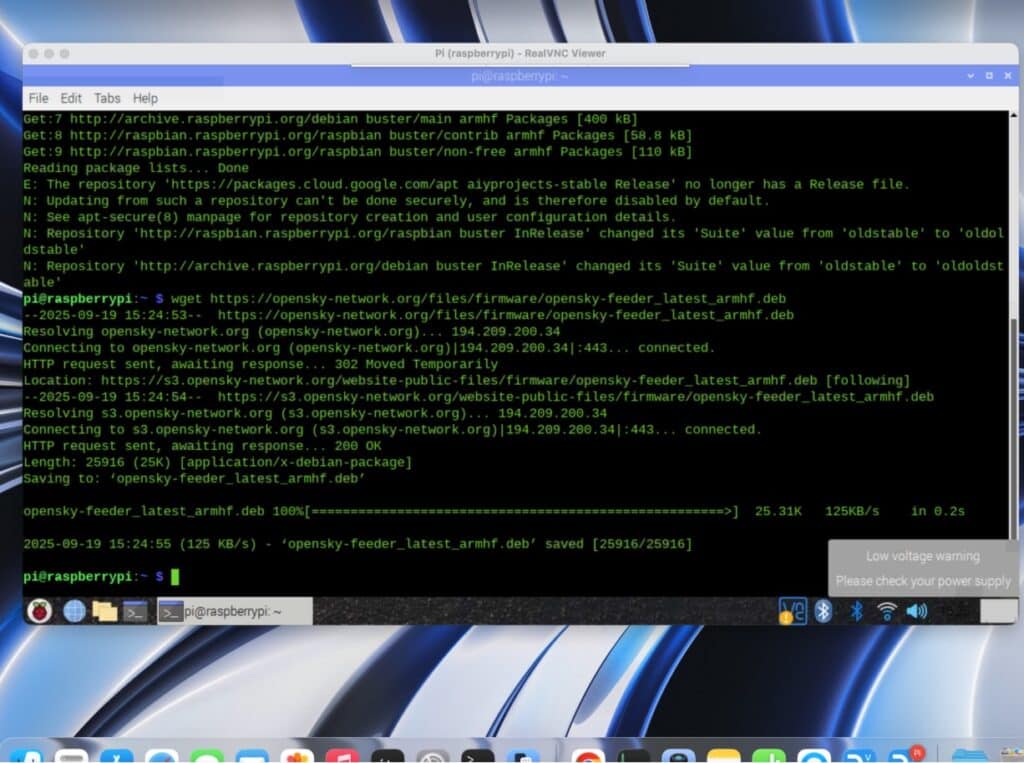
For manual installation, open the Linux terminal on your Raspberry Pi and run the following command:
wget https://opensky-network.org/files/firmware/opensky-feeder_latest_armhf.deb
sudo dpkg -i opensky-feeder_latest_armhf.deb
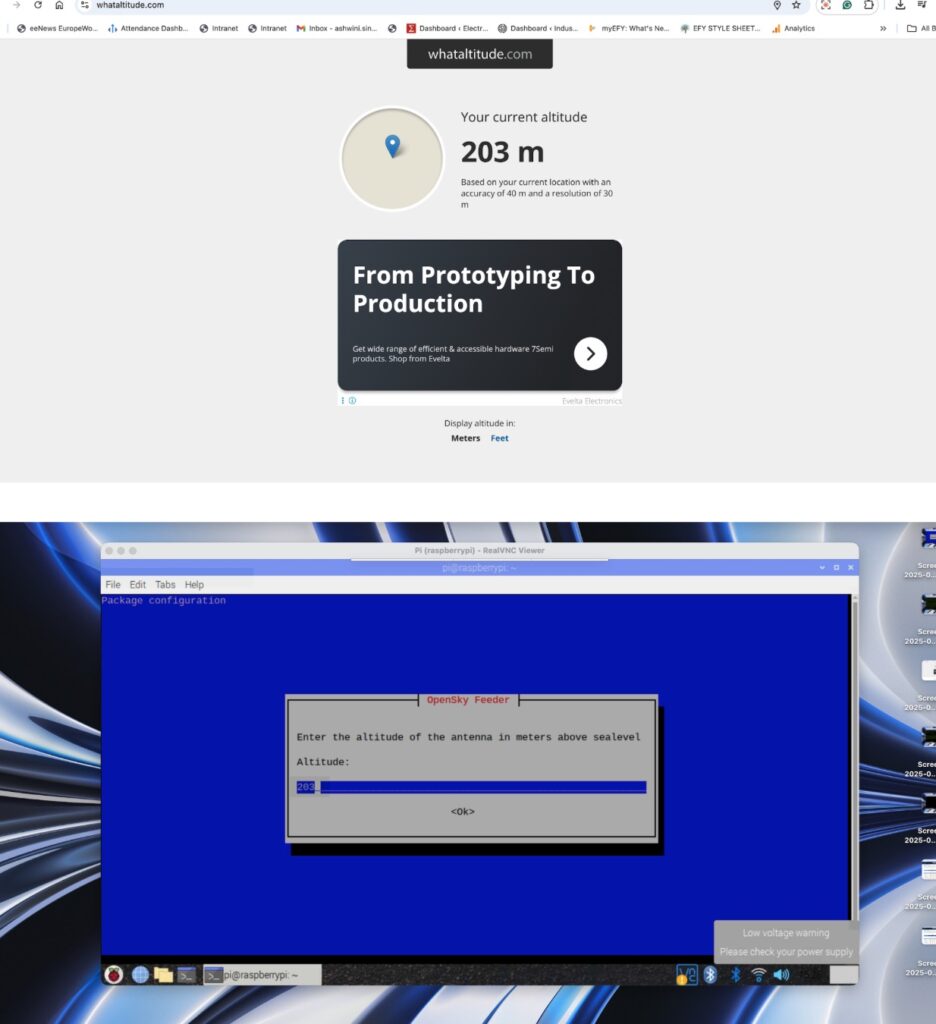
After running the following command, it will install and open a window asking for your latitude and altitude. You can find your current altitude using this link.
Then, after getting the altitude, you can insert it into the window on the Pi, and you are ready to set up. Do the rest, including the account username as asked for by OpenSky, and the code you can check the previous OpenSky link for. After adding everything as instructed, your radar for flight is ready.
Testing Raspberry Pi Flight Tracker

For FlightRadar24
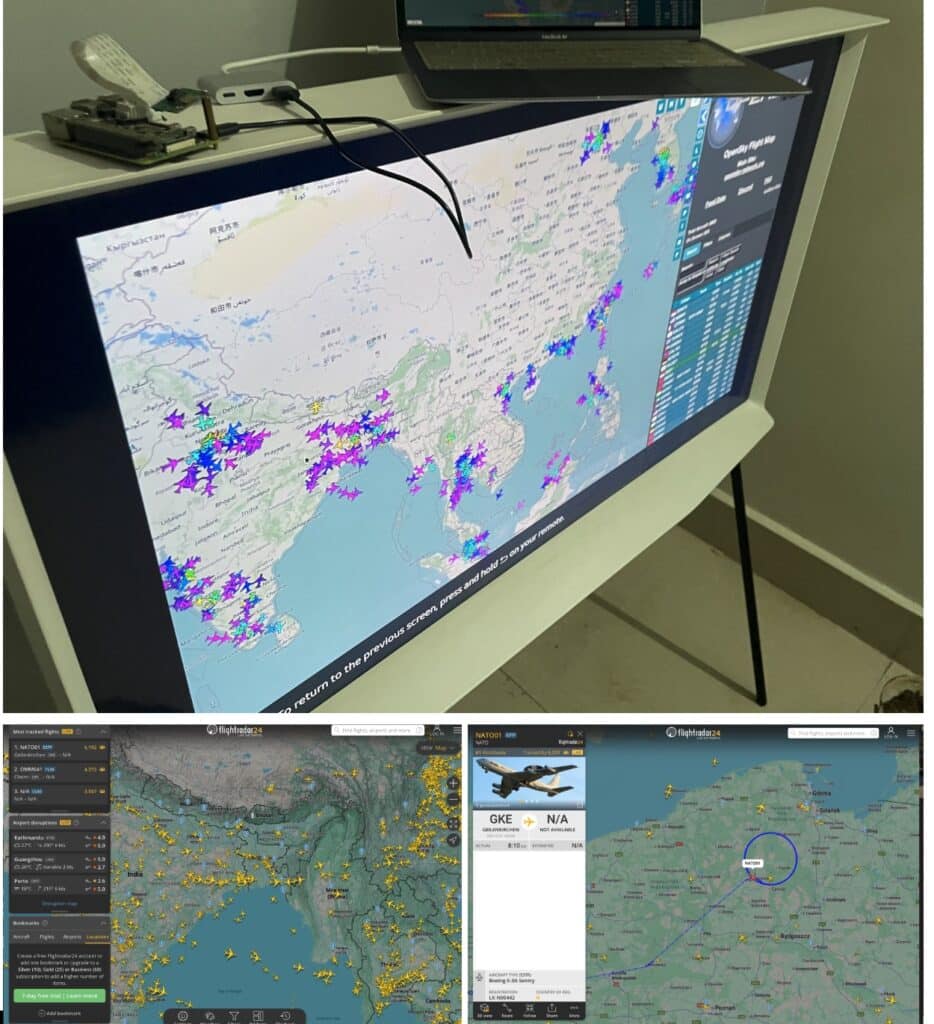
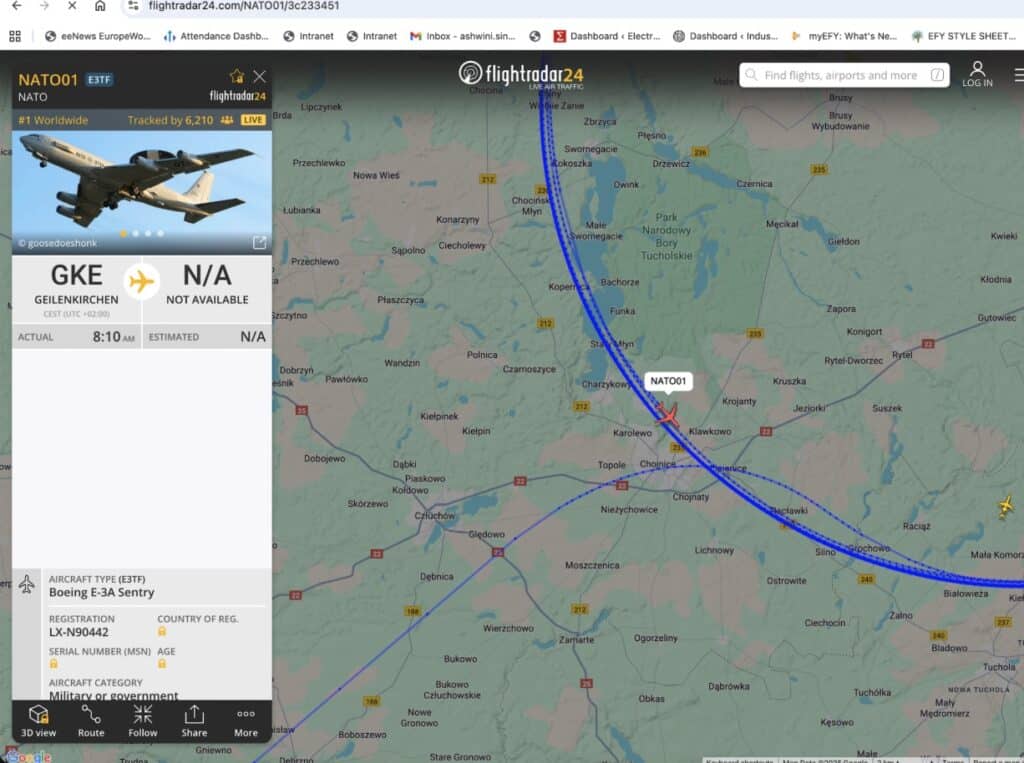
Open the FlightRadar24 website as earlier; there, your data is fed along with many others who are feeding the data, and you can see them in real-time tracking flight paths, times, etc., in real-time or see near you. Navigate to the location near you, and you can see the data of your radar.
For OpenSky
Click on this URL to track and see the radar data. You can now connect a large display using HDMI to the Raspberry Pi.
