


 Lifts/elevators in buildings, hotels and hospitals are used by many people. If it’s a structure with over more than 100 floors, then using stairs is not a convenient option, especially for physically challenged and old-age people.
Furthermore, in the current scenario of COVID-19, the chances of spreading the virus and other germs by touching the surfaces of switches and buttons has increased.
So, to minimise this risk, we will design a new, contactless gesture-based switch panel that can effectively replace the old, touch-based switch panel used in lifts. Our contactless gesture-based switch control panel is not just limited to lifts but can also be implemented in other areas such as vending machines, ATMs and many more.


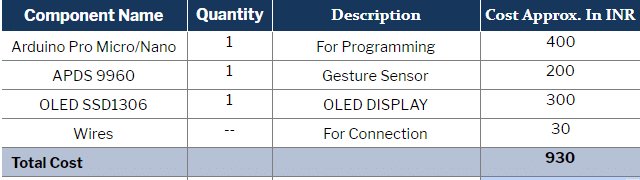
So, let’s start our project by shopping the following components:
Bill of Materials
Coding
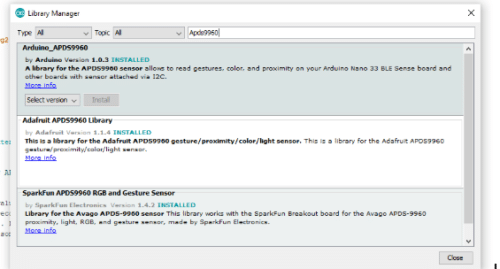
Open the Arduino IDE and go to Sketch -> Library Manager -> Search. Enter the names of the following libraries and install them.
- U8g2
- Arduino APDS9960
After that, let’s begin with our code.
First of all, we need to add the libraries in the code and then set the pin definitions for controlling the lift motor. 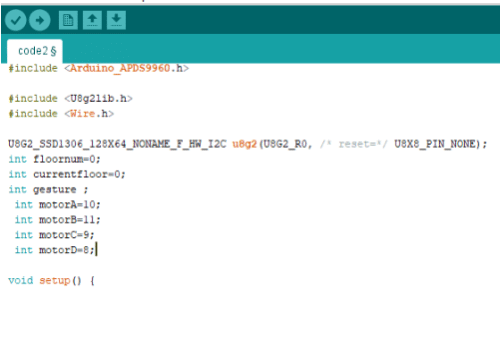
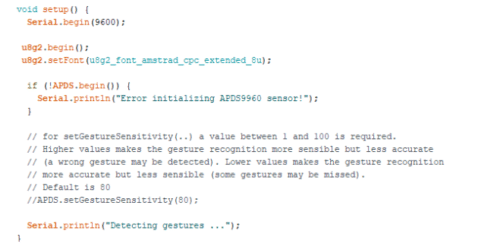
Next, create a setup function where we will set the SSD1306 I2C connection and communication. Also, set the serial baud rate for serial debugging and for recognising the gesture on the serial monitor via the sensor.
We will then create a loop function that runs repeatedly. This loop will check the gesture as detected from the sensor. If the detected gesture (that is, with the thumb pointing upwards) indicates going in the upward direction, then set the function for it. The function will allow an increase in the number of floors.
So, suppose you want to reach the 3rd floor. To go there, simply make a thumb gesture for going upwards three times. On doing this, the control panel will capture your gesture and set the lift mechanism to go to the third floor. After deciding which floor, you want to go to, make a leftward gesture so that the lift control panel can acknowledge the decision. If you want to get off at an earlier floor, say 2nd floor due to an emergency, then
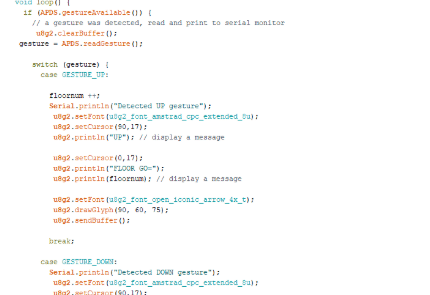
make a rightwards gesture to stop the lift. All these gestures resemble the functions like up, down, OK and stop that are normally present in a lift.
After setting the loop function, we will then set the function for the motor and set the pin modes to control the motor for example up function, stop function, down function.
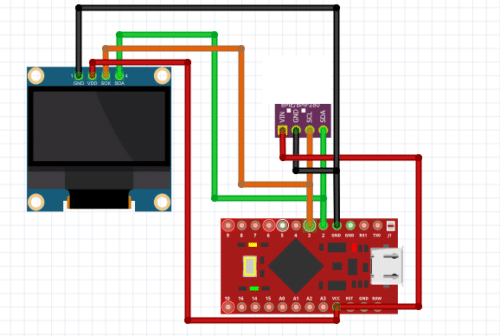
Connection
Connect the components as shown for the OLED and gesture sensor.
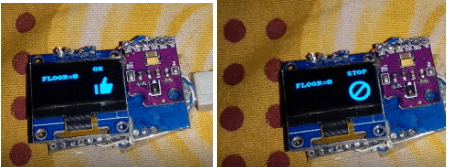
Testing
After connecting the components, power the Arduino and then give the gestures up or down to set the floor where you want to go. Then give the gesture left for acknowledging the lift to go to that position. Give the gesture right to stop the lift.


But it isn’t feasible to reach the 100 floor using this technique, can you please modify it
yes for 100 floor you can use another project https://www.electronicsforu.com/electronics-projects/hardware-diy/qr-code-based-ui-for-vending-machine-atm-and-lift
Sir, thank you. can I use ESP32?
yes sure , you might need slight change in code