The MicroPython project is an open source implementation of Python 3 that includes a small subset of Python standard libraries, and is optimised to run on microcontrollers with constrained environments like limited ROM, RAM and processing power. It came about after a successful Kickstarter campaign by Damien George.
What MicroPython is
MicroPython includes the standard Python interpreter that runs on small embedded development boards. With MicroPython you can write Python scripts to control hardware. For example, you can make LEDs blink, communicate with a temperature sensor, control motors and publish a sensor reading on the Internet. It is worth noting that the firmware for such embedded devices is generally coded in Assembly, C or C++, but by using MicroPython you can achieve almost the same results as with high-level Python.

What MicroPython is not
Unlike the desktop version of Python, MicroPython is a stripped-down version for microcontrollers; therefore it does not support all Python libraries and functionalities. In the world of microcontrollers, the firmware is directly burned to the ROM (also known as program memory), and there is no file system. MicroPython implements a minimal type of file system directly on the flash memory of the microcontrollers. If the device has 1MB or more of storage, then it will be set up (upon first boot) to contain a file system. This file system uses FAT format and is stored in the flash memory by MicroPython firmware. This gives you the benefit of being able to access, read and write files within the main Python program for flexible storage operations.
There are two files that are treated specially by ESP8266 when it starts up: boot.py and main.py. The former script is executed first (if it exists), and once it completes, the latter script is executed. You can create these files yourself and populate these with the code that you want to run when the device starts up. boot.py generally contains boot parameters like whether to have serial debugging on or off, which Wi-Fi AP to connect, main code to run and so on. Looping stays in main.py, for example, the logic for blinking LEDs.
It is also worth noting that microcontrollers are generally programmed in C, wherein direct registers are accessed and manipulated to use the peripherals of microcontrollers.Firmware code is cross-compiled and built for the target microcontroller architecture, and is flashed using a suitable programmer. MicroPython abstracts all these steps, but the constraint here is the real-time feature of microcontrollers, in general. Hence, MicroPython is not suitable for strict real-time applications.

Boards supported by MicroPython
There are numerous boards/chipsets supported by MicroPython, and more are expected to do so in the near future as the project matures. The current board support list is given below.
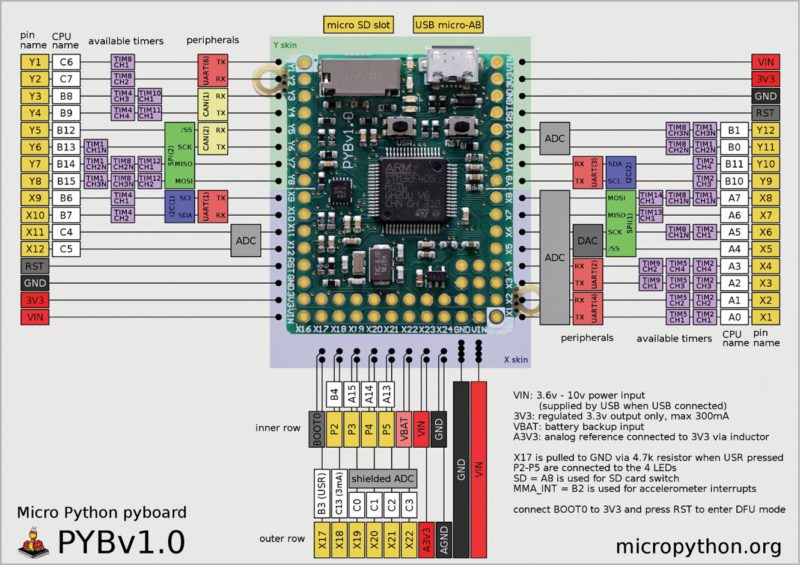
pyboard
This is the official MicroPython board, which comes with full MicroPython support out-of-the-box. It features STM32F405RGT6 ARM Cortex M4 based processor. MicroPython supports APIs for almost all hardware peripherals of the chip like GPIO, I2C, SPI and UART.
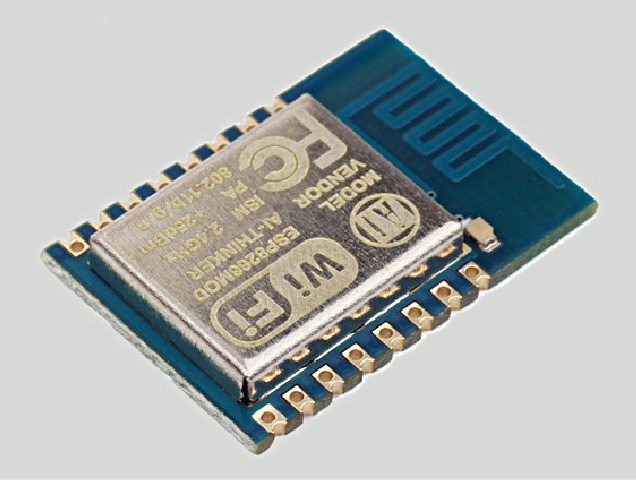
ESP8266
MicroPython support for the low-cost Wi-Fi development ESP8266 microcontroller is excellent. Wi-Fi and Internet accessibility are made available within MicroPython using a special network library. There is also a Web based read-evaluate-print-loop (REPL) that allows you to run MicroPython code on ESP8266 using a Web browser within a local network.
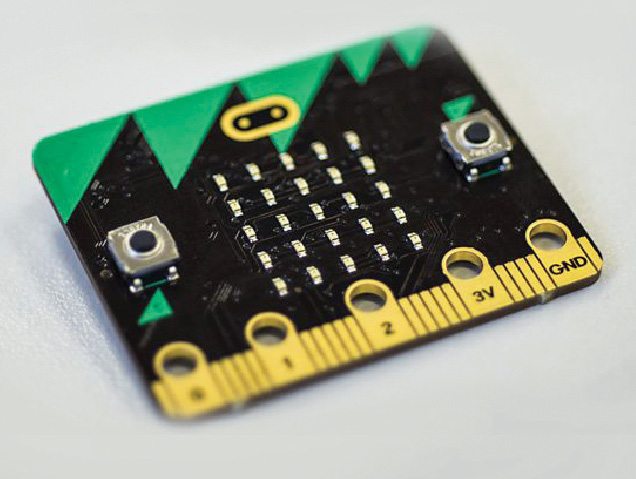
BBC micro:bit
This is a new board aimed at teaching kids computer programming. Using MicroPython on micro:bit, you can access the board’s peripherals like LEDs and accelerometers.
Note
The full list of supported boards can be found at MicroPython website.
Supported library stacks
Python supports a variety of libraries on desktop computers, but porting these directly to a microcontroller is not an easy task as these are not optimised for running on machines with less RAM. Instead of making existing useful Python libraries available in MicroPython, these are stripped in order to be better optimised to run on constrained hardware. Current libraries supported by MicroPython are named with the initial u, which stands for Micro
Library implementation:
• ucollections – collection and container types
• uhashlib – hashing algorithm
• uheapq – heap queue algorithm
• uio – input/output streams
• ujson – JSON encoding and decoding
• uos – basic operating system services
• ure – regular expressions
• usocket – socket module
• ustruct – pack and unpack primitive data types
• utime – time-related functions
• uzlib – zlib decompression
Functionalities specific to MicroPython implementation are available in the following libraries:
• machine – for functions related to the board
• micropython – to access and control MicroPython internals
• network – for network configuration
• uctypes – to access binary data in a structured way
Following libraries are specific to pyboard:
• pyb – for functions related to the board
• Time-related functions
• Reset-related functions
• Interrupt-related functions
Note
The full list of supported libraries can be found at MicroPython website.
Loading MicroPython on ESP8266 board
ESP8266 is a cheap Wi-Fi development board. Since MicroPython exposes all required APIs including the networking stack, this chip is the preferred choice for learning how to load MicroPython. ESP8266 raw chip modules require a USB-to-TTL converter and a 3.3-volt stable power source to interact with the computer. Hence, you can use a complete ESP8266 board like NodeMCU or Adafruit Feather HUZZAH, which has all necessary components on the same board.

To flash MicroPython firmware binary on ESP8266 board, a handy command line tool known as esptool can be used. It can be downloaded directly from Python package manager using the following commands:
sudo pip install esptool
Check for the serial port after
connecting the board it is /dev/tty.
SLAB_USBtoUART in our case
ls /dev/tty* can help you identify it.
esptool.py –port “serial_port” erase_
flash
esptool.py –port “serial_port” –baud
460800 write_flash –flash_size=detect 0
“firmware_file”
Here, .bin firmware file should be kept in the current working directory:
iAyan:~ iAyan$ sudo esptool.py –port /
dev/tty.SLAB_USBtoUART erase_flash
esptool.py v1.2.1
Connecting…
Running Cesanta flasher stub…
Erasing flash (this may take a while)…
Erase took 10.8 seconds
iAyan:~ iAyan$ esptool.py –port /
dev/tty.SLAB_USBtoUART –baud 460800
write_flash –flash_size=detect 0 esp8266-
20161110-v1.8.6.bin
esptool.py v1.2.1
Connecting…
Auto-detected Flash size: 32m
Running Cesanta flasher stub…
Flash params set to 0x0040
Writing 569344 @ 0x0… 569344 (100 %)
Wrote 569344 bytes at 0x0 in 14.1
seconds (324.1 kbit/s)…
Leaving…
iAyan:~ iAyan$
Using the serial REPL
Just like flashing MicroPython to the board, its REPL can be accessed over the serial port. Simply connect your MicroPython compatible board, ESP8266 board in this case, and it will mount as a serial device (COMMxx in Windows and /dev/ttySiLabs in OSX and Linux). Use any serial emulator like Putty on Windows, or minicom or screen on Linux/OSX to access the serial REPL, using the baud rate of 115,200, as follows:
sudo screen /dev/tty.SLAB_USBtoUART
115200
or
sudo minimum -D /dev/ttySLAB_USBtoUART
For Windows, use Putty, for which the serial to be used is COMMxx (xx=COMM port number under Device Manager) and the baud rate is 115,200.
If everything goes well, you will see the familiar Python prompt, at which point you can write Python commands and view the immediate outputs. Type ‘print (“Hello World!”)’, and yes, it is the same old Python that you love.
sudo screen /dev/tty.SLAB_USBtoUART
115200
“press enter”
>>> print(“Hello, MicroPython!”)
Hello, MicroPython!
>>> 2+5
7
>>>
Using WebREPL
One unique feature of MicroPython on the boards that support networking (like ESP8266) is a WebREPL (REPL like a Python command line) that is accessible through a Web page. Instead of using a serial connection to the board, you can run Python code directly from your browser in a simple terminal. You do not even need to connect the board to a Wi-Fi network; it can create its own network, which you can use to access WebREPL. The new releases of MicroPython come with WebREPL disabled by default, so use the following commands to enable it over serialREPL:
>>> import webrepl_setup
WebREPL daemon auto-start status:
disabled
Would you like to (E)nable or (D)isable
it running on boot?
(Empty line to quit)
> E
To enable WebREPL, you must set
password for it
New password: python
Confirm password: python
Changes will be activated after reboot
Would you like to reboot now? (y/n) y
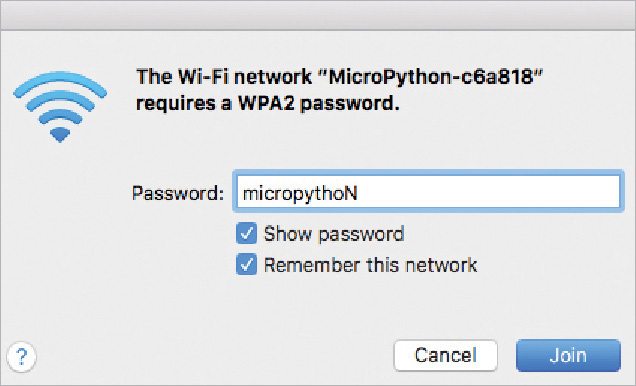
Once enabled, ESP8266 will start in AP mode and create a hotspot. You can connect to it with the password micropythoN and access WebREPL using the IP ws://192.168.4.1:8266/. Enter the password that you set earlier. WebREPL client can be accessed here or downloaded from GitHub (https://codeload.github.com/micropython/webrepl/zip/master).
Tools to make life easy
Adafruit MicroPython Tool (Ampy)
This utility is used to interact with MicroPython board over a serial connection. Ampy is a simple command line tool to manipulate files and run code on MicroPython board over its serial connection. With it, you can send files from your computer to a MicroPython board’s file system, download files from a board to your computer and send a Python script to a board to be executed. Download Ampy using Python Pip.
sudo pip3 install adafruit-amp
Transfer files from a PC to the board using Ampy and vice versa, as follows:
ampy –port “serial_port” put “file_name.py”
ampy –port “serial_port” get “file_name.py”
iAyan:~ iAyan$ ampy –port /dev/tty.SLAB_USBtoUART get boot.py
# This file is executed on every boot (including wake-boot from deepsleep)
#import esp
#esp.osdebug(None)
import gc
import webrepl
webrepl.start()
gc.collect()
iAyan:~ iAyan$ ampy –port /dev/tty.SLAB_USBtoUART put main.py
iAyan:~ iAyan$ ampy –port /dev/tty.SLAB_USBtoUART ls
boot.py
webrepl_cfg.py
main.py
This is handy to transfer main.py file to board and will run as soon as the board boots after boot.py file.
Hardware tinkering with MicroPython
Hardware hacking – GPIO
Connect the positive side, that is, anode of the LED to pin 15 on ESP8266 board via a 330-ohm resistor and the negative side or cathode (shorter leg) to the ground pin.
import machine
import time
pin_number = 15
pin = machine.Pin(pin_number, machine.Pin.OUT)
while True:
pin.high()
time.sleep(1)
pin.low()
time.sleep(1)
Networking with MicroPython
Networking is a powerful feature of microcontrollers, thanks to the Internet of Things. ESP8266 is a low-cost Wi-Fi development board and, because of MicroPython, it exposes the required APIs to access networking on ESP8266.
A script to connect your board to your router and open the gate to the Internet is:
>>> import network
>>> AP_NAME = “ “
>>> PASSWORD = “ “
>>> ap = network.WLAN(network.STA_IF)
>>> ap.active(True)
#5 ets_task(4020ed88, 28, 3fff9708, 10)
>>> ap.connect(AP_NAME, PASSWORD)
>>> ap.ifconfig()
(‘192.168.1.127’, ‘255.255.255.0’,
‘192.168.1.1’, ‘192.168.1.1’
Congratulations! ESP8266 is now a device on your local network with just five lines of Python code. Now you can access WebREPL over this IP address.